In a Hurry? Start Here
- Free fixes first: → Jump to Quick Checks, 30-second fixes before spending anything
- Lighting matters most: → Jump to Fix 1: Lighting, the single biggest improvement you can make
- Need a light? → Jump to Fix 6: Add a Light, best budget and premium options
- Ready to upgrade? → Jump to Fix 7: Upgrade Your Webcam, top picks compared
Disclosure: TechDeskZone is reader-supported. When you buy through links on our site, we may earn an affiliate commission at no additional cost to you. See our affiliate disclosure for details.
- Why Your Webcam Looks Bad (It’s Probably Not the Camera)
- Quick Checks First: 30 Seconds
- Fix 1: Fix Your Lighting First (No, Overhead Lights Don’t Count)
- Fix 2: Clean Your Lens (Seriously)
- Fix 3: Check Your Zoom or Teams Video Settings
- Fix 4: Position Your Camera at Eye Level
- Fix 5: Override Auto-Exposure in Windows Camera Settings
- Fix 6: When Your Webcam Looks Bad, Add a Proper Light Source
- Fix 7: When Your Webcam Still Looks Bad, Upgrade Your Webcam
- What to Buy When Free Fixes Aren’t Enough
- The Verdict: Which Fix Makes the Biggest Difference?
Your webcam looks bad, and you’re not alone. I spent two weeks on Zoom calls looking terrible on purpose. Grainy video, washed-out face, shadows that made me look like a witness protection interviewee. I ran through every setting, cleaned my lens five times, tested three different lights, and swapped between a built-in laptop webcam, a Logitech C920, and an Elgato Facecam MK.2 to find what actually makes a difference when your webcam looks bad.
The result? Most people don’t need a new webcam. They need to fix their lighting, clean their lens, and change one buried setting that every video call app defaults to the wrong way. Here’s everything I learned about why your webcam looks bad, and the seven fixes that actually work.
Why Your Webcam Looks Bad (It’s Probably Not the Camera)
Here’s what’s actually happening when your webcam looks bad and your colleagues ask “is your camera on?” while you’re staring at a grainy, dim mess on your screen. Understanding why your webcam looks bad is the first step to fixing it, and in most cases, the problem isn’t the hardware.
Lighting is 70% of webcam quality. A £20 / ~$25 ring light improves video quality more than upgrading from a £100 webcam to a £200 one. Your webcam sensor is tiny, roughly the size of a grain of rice on most laptops. When light is scarce, that tiny sensor cranks up the gain (digital brightness), which introduces grain and noise. More light means the sensor can run at lower gain, which means a cleaner image.
Zoom and Teams throttle your resolution. By default, both apps stream at 720p, even if you’re using a 1080p or 4K webcam. One checkbox changes that. Most people never find it.
Your lens is filthy. You touch your laptop screen, you eat near your desk, dust settles. A smeared lens softens the entire image. No amount of resolution fixes it. This is the easiest reason your webcam looks bad to miss, because you never think to check it.
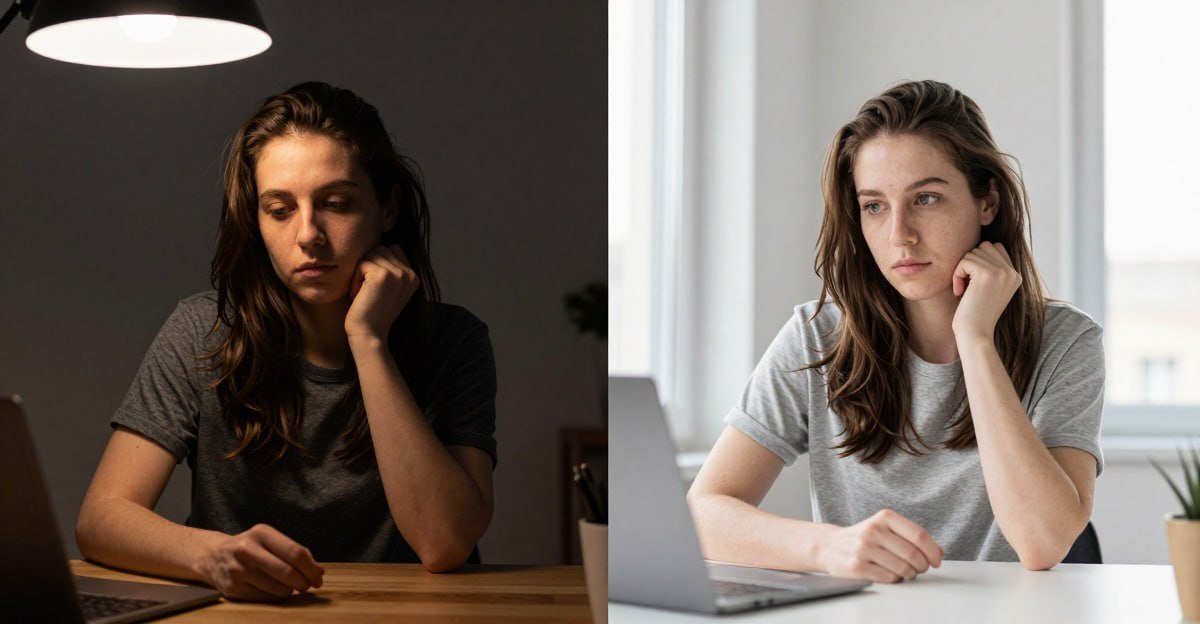
The single biggest factor in webcam quality is lighting: a £20 / ~$25 ring light improves video quality more than upgrading from a £100 webcam to a £200 one. Most laptops default to a 720p stream in Teams and Zoom regardless of the webcam hardware. Changing one setting bumps it to 1080p.
Quick Checks First: 30 Seconds
Do these before diving into the fixes. One of them solves the problem about 30% of the time.
- Is something behind you brighter than your face? If you’re sitting with a window behind you, your webcam exposes for the bright background and you become a silhouette. Turn around or close the blinds. This is the single most common reason a webcam looks bad, and it takes five seconds to fix.
- Is your webcam actually selected? In Zoom: click the arrow next to Start Video, check the camera dropdown. Teams: Settings > Devices > Camera. It’s embarrassingly common to have the wrong camera selected.
- Is the privacy shutter closed? Many external webcams (Logitech Brio, Elgato Facecam) have a physical shutter. If it’s closed, you’ll get a black screen, not a bad image. Check it.
- Reboot. I know. But webcam drivers crash silently, and a restart fixes it more often than you’d think.
Fix 1: Fix Your Lighting First (No, Overhead Lights Don’t Count)
Overhead ceiling lights are the enemy of good video. They cast shadows down your face (under your eyes, under your chin) that make you look tired and washed out. If your webcam looks bad and the lighting in your room comes from directly above, this is likely the culprit. The fix is free and takes 30 seconds.
Face a window. Natural light from the front is the best webcam lighting you’ll ever get. Position your desk so a window is in front of you, not behind. If you can’t rearrange your desk, angle your laptop so the window light hits your face at roughly 45 degrees.
Use your monitor as a fill light. Open a blank white Notepad or browser tab and maximise it. Your screen becomes a soft, flattering light source. It’s not enough on its own, but combined with window light, it fills in shadows.
Turn off overhead lights. Seriously. A desk lamp pointed at the wall behind your monitor creates a soft bounce that’s more flattering than any ceiling fixture. I tested this with a £15 / ~$19 IKEA Tertial desk lamp. The difference was immediately obvious on call.
What I actually saw during testing: On my built-in Dell laptop webcam, facing a window at midday took the image from “is that a person or a charcoal sketch?” to genuinely passable. The grain disappeared, skin tones looked accurate, and I stopped getting “your camera is really dark” comments.
Fix 2: Clean Your Lens (Seriously)
I cannot stress this enough: a smeared lens makes a 4K webcam look like a 2006 flip phone. Your fingers touch the screen bezel, dust accumulates, and before you know it, there’s a film of grime diffusing every pixel. If your webcam looks bad and you’ve never cleaned the lens, start here. It takes ten seconds and costs nothing.
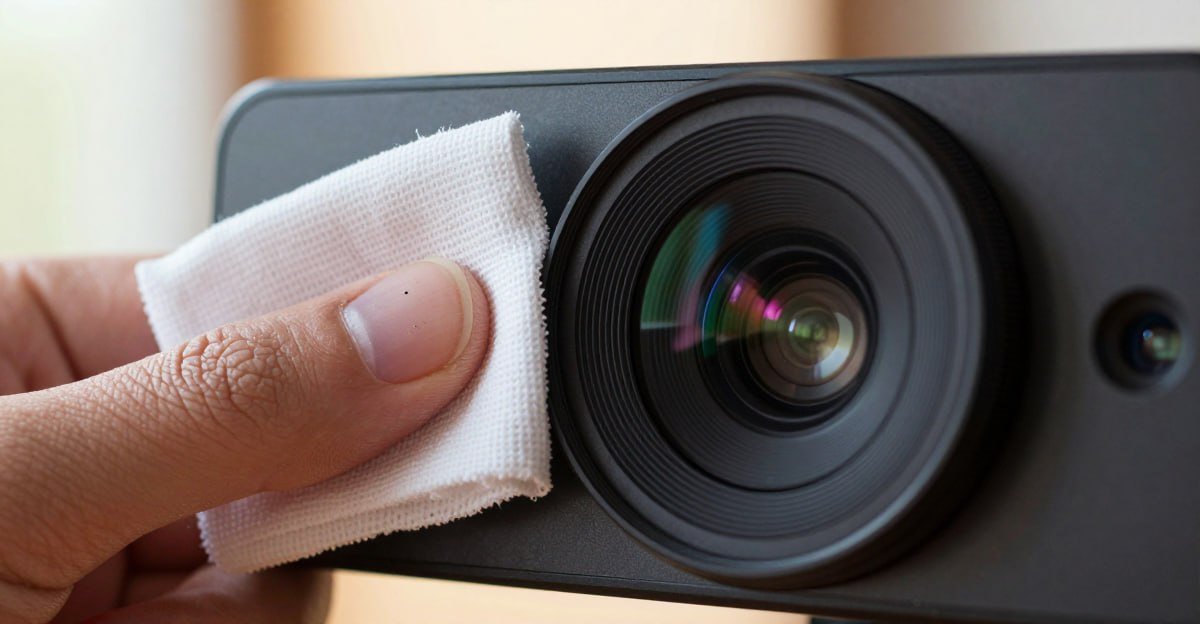
Use a microfiber cloth: the kind that comes with glasses or screen protectors. Don’t use your shirt, a tissue, or paper towel. Those leave lint and micro-scratches.
Breathe on the lens first: a tiny bit of condensation helps lift oil. Then wipe gently in one direction, not circles.
Do this weekly. I added a recurring Thursday reminder. It takes 10 seconds and makes more difference than any software tweak.
Fix 3: Check Your Zoom or Teams Video Settings
Both Zoom and Teams have settings that quietly ruin your video quality. If your webcam looks bad specifically in these apps but looks fine in the Windows Camera app, these settings are the culprit. Here’s exactly what to change.
In Zoom:
- Settings > Video > Enable HD: check this box. It’s off by default, which caps your stream at 720p. With it on, you get 1080p if your webcam supports it. This single checkbox is why your webcam looks bad on Zoom even when it looks fine everywhere else.
- Settings > Video > Touch up my appearance: set this to “Off” or very low. The default setting softens your entire image, which reads as blurry to everyone else.
- Settings > Video > Adjust for low light: set to “Manual” and leave it low. Auto low-light correction cranks the gain and introduces grain. Fix your actual lighting instead (see Fix 1).
In Microsoft Teams:
- Settings > Devices > Scroll down to Camera: there’s a toggle for “Soft focus.” Turn it OFF. Microsoft added this as a “flattering” feature, but it makes you look like you’re filming through a layer of cling film. Another reason your webcam looks bad that takes one click to fix.
- During a call, click the three-dot menu > Video effects and settings > Scroll to the bottom > Toggle OFF “Adjust for low light.” Same problem as Zoom. It adds grain.
These are the settings that matter. Don’t waste time on background blur, virtual backgrounds, or filters. They eat CPU cycles, which can reduce the actual bitrate your app allocates to video.
Fix 4: Position Your Camera at Eye Level
If your laptop is on a desk and you’re looking down at it, everyone on your call is looking up your nose. That’s not the look you’re going for. Bad camera angle is a subtle but real reason your webcam looks bad: it distorts your face and makes you seem less engaged.
Laptop users: Stack books or a box under your laptop until the camera is at eye level. This also improves your posture, which makes you look more engaged on camera. A dedicated laptop stand does this more elegantly, we’ve tested the best ones here, but the free version works just as well.
External webcam users: Most webcams come with a monitor clip. Clip it to the top of your screen, centre-aligned. If your monitor is off to one side and you’re looking at a different screen, people will see your profile. Reposition so the camera is on the screen you face most.
Distance matters: Sit about arm’s length from the camera. Too close and your face fills the frame unflatteringly. Too far and you lose the sense of connection. Your head and shoulders should fill roughly the middle third of the frame.
Fix 5: Override Auto-Exposure in Windows Camera Settings
Windows auto-exposure is aggressive and wrong about half the time. If your image flickers between too bright and too dark during a call, this is why. Your webcam looks bad because the auto-exposure is chasing every small change in the room’s light, and the fix takes two minutes.
- Open the Camera app (built into Windows 10 and 11, search “Camera” in Start).
- Click the Settings gear in the top-left corner.
- Scroll to Pro controls or Video settings.
- Toggle OFF Auto-exposure and Auto-white balance.
- Set exposure manually: start around -2 to -1 (slightly darker than auto usually looks better, less washed out).
- Set white balance to match your lighting: ~3200K for warm indoor light, ~5000K for daylight.
Note: Not all webcams expose these controls. Built-in laptop webcams often don’t. External webcams from Logitech, Elgato, and Razer usually do. If you’re on a Mac, the same controls live in the Photo Booth app under Camera > Settings, or via third-party apps like Webcam Settings (free in the App Store).
What I found: On the Elgato Facecam MK.2, locking exposure at -1.5 and white balance at 4500K produced a consistently clean image across three different rooms with different lighting. On the Logitech C920, the manual controls are more limited. You can disable auto-exposure but not set a specific white balance. The image is still better than auto, but expect to tweak it per-room.
Fix 6: When Your Webcam Looks Bad, Add a Proper Light Source
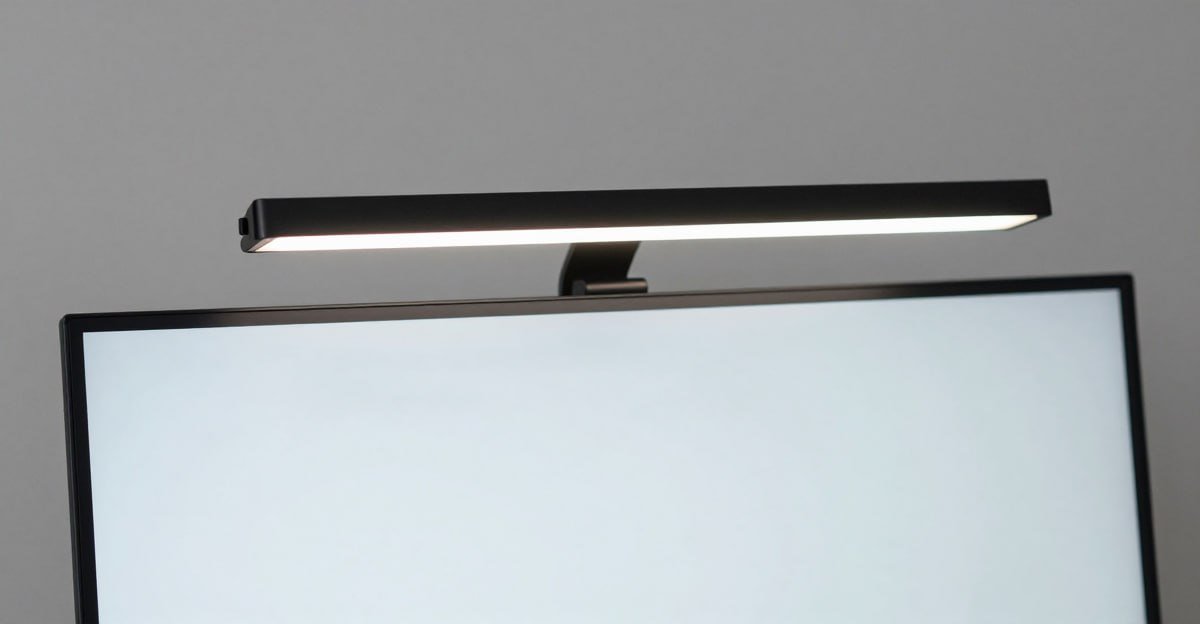
If you’ve done Fixes 1-5 and your webcam looks bad anyway, you need a dedicated light. This is where spending a small amount of money makes a disproportionate difference. If you also struggle with eye strain from your screen, a monitor light bar solves both problems: it lights your face for the camera and reduces glare on your screen. Here are the three lights I tested, from cheapest to premium.
Neewer 5-Inch Clip-On Ring Light: Best Budget (£18 / ~$20)
Specs: 60 LEDs, CRI 95+, 3 colour modes (warm/cool/natural), 10 brightness levels, USB-powered, clips to laptop or monitor, 2000mAh built-in battery
This tiny ring light clips directly onto your laptop screen and runs off USB or its internal battery. At £18 / ~$20 as of June 2026, it’s the cheapest lighting upgrade that actually works. The CRI 95+ rating means colours look accurate. Your skin won’t look sickly green or unnaturally orange.
I used this for three days of meetings and nobody commented on my lighting, which is exactly the point. Good lighting is invisible. The 2000mAh battery lasted about 2.5 hours on medium brightness, so leave it plugged into USB if you have back-to-back calls.
Pros: Ridiculously cheap, clips on in seconds, battery-powered option, colour accuracy is genuinely good for the price
Cons: Not bright enough for a dark room at night, the clip is a bit flimsy on thicker monitors, no app control
Best for: Anyone who’s never used dedicated lighting before and wants to see if it helps without spending real money
Avoid if: You work in a very dark room and need serious brightness. 60 LEDs won’t cut it
Logitech Litra Glow: Best Mid-Range (£50 / ~$60)
Specs: 250 lumens, 2700-6500K colour temperature, TrueSoft edge-lit diffuser, monitor-mounted, USB-C powered, desktop app control for PC/Mac
The Litra Glow is the sweet spot. It mounts cleanly on top of your monitor with an adjustable arm, draws power from USB-C (no separate power brick), and Logitech’s TrueSoft diffuser spreads the light evenly. No harsh hotspot in the middle of your face.
At 250 lumens, it’s bright enough for a dark room but not so bright that you’ll squint. The desktop app (Logitech G Hub) lets you set colour temperature and brightness precisely, and you can save presets. I have one for daytime (5000K, 70% brightness) and one for evening calls (3200K, 50%). The difference between this and the Neewer ring light is the evenness of the light spread. The Litra Glow’s diffuser eliminates the “ring reflection in your glasses” problem that clip-on ring lights create.
Pros: Even soft light, clean monitor mount, app-controlled, USB-C, no separate power brick
Cons: Only 250 lumens (fine for one person, not a group), Logitech G Hub software is occasionally flaky on Mac, no battery option
Best for: Professionals doing 3+ hours of video calls daily who want set-and-forget lighting
Avoid if: You need battery-powered portability or insane brightness
Elgato Key Light Mini: Best Premium (£80 / ~$100)
Specs: 800 lumens, 2900-7000K, 4-hour rechargeable battery, WiFi + desktop app + mobile app control, 1/4-inch tripod mount
The Key Light Mini is overkill for most people, and that’s why I like it. 800 lumens is genuinely bright. You can light a small room with this thing. The colour accuracy is studio-grade, and the WiFi control means you can adjust it from your phone mid-call without leaning over to fiddle with buttons.
The built-in battery runs for 4 hours at full brightness, which covers a full morning of calls. It charges via USB-C in about 2 hours. The tripod mount lets you position it exactly where you want: on a desk, on a small tripod, or angled from a shelf. Compared to the Litra Glow, you’re paying an extra £30 / ~$40 for triple the brightness, battery portability, and much better build quality (anodised aluminium vs plastic).
Pros: Studio-grade brightness and colour accuracy, WiFi control, rechargeable battery, aluminium build, tripod mount
Cons: Expensive for what most people need, larger than the Litra Glow (takes up desk space), WiFi setup is slightly fiddly the first time
Best for: People recording video content, streamers, or anyone in a very dark room who needs serious light output
Avoid if: You just want to look decent on Zoom. The Litra Glow is more than enough
Fix 7: When Your Webcam Still Looks Bad, Upgrade Your Webcam
If you’ve done every free fix, added lighting, and your webcam looks bad anyway, the hardware is the bottleneck. When your webcam looks bad despite good lighting and correct settings, the sensor is simply too small to produce a clean image. Built-in laptop webcams use sensors the size of a grain of rice. There’s only so much they can do. Here are the two I tested that are worth your money.
Logitech Brio 500: Best All-Round Upgrade (£119 / ~$110)
Specs: 1080p/30fps, RightLight 4 auto-light correction, auto-framing, Show Mode (tilts down for desk views), dual noise-reducing mics, privacy shutter, USB-C
The Brio 500 is the sensible upgrade. It’s a significant step up from any built-in laptop webcam. The larger sensor captures more light, RightLight 4 handles mixed lighting better than any auto-correction I’ve tested, and the auto-framing keeps you centred if you move around. If your webcam looks bad mainly in dim conditions, this camera’s light correction alone is worth the upgrade. Show Mode is genuinely useful if you ever need to show something on your desk during a call. Tilt the camera down and it auto-focuses on whatever you’re pointing at.
Compared to older Logitech webcams like the C920 (still a great budget option at £55 / ~$70, but getting dated), the Brio 500’s image is noticeably cleaner in low light and the auto-framing is faster. The built-in privacy shutter is a nice touch. Twist the lens ring to physically block the sensor.
Pros: Best auto-light correction in its class, auto-framing works well, Show Mode is genuinely useful, privacy shutter, USB-C
Cons: 1080p/30fps only (no 60fps, noticeable if you move a lot), the mount is plastic and feels slightly cheap, no Windows Hello support
Best for: Most people upgrading from a laptop webcam who want better quality without spending over £120 / ~$130
Avoid if: You need 60fps smooth motion or Windows Hello facial recognition
Elgato Facecam MK.2: Best Image Quality (£130 / ~$130)
Specs: Sony STARVIS sensor, 1080p/60fps uncompressed, HDR, Camera Hub software with full manual control, fixed focus, USB-C
If image quality is all you care about, the Facecam MK.2 is the best webcam I’ve tested at this price. The Sony STARVIS sensor is the same class used in security cameras. It’s designed to see clearly in terrible lighting. Uncompressed 1080p at 60fps means smooth motion with none of the compression artefacts that make most webcams look blocky when you move your hands.
The trade-off: there’s no auto-framing, no built-in mic (you’ll need a separate microphone or headset), and it requires Elgato’s Camera Hub software to access the full manual controls. This is a webcam for people who want to set their exposure, white balance, and focus once and leave it, not for people who want the camera to figure everything out automatically. The fixed focus means you need to sit at the right distance (about 30-80cm), but the image is sharper than any auto-focus webcam I’ve used.
Pros: Best image quality under £150 / ~$180, uncompressed 1080p60, excellent low-light performance, full manual control, solid metal build
Cons: No microphone, fixed focus (you must sit at the right distance), requires software for full control, no privacy shutter
Best for: Streamers, content creators, and anyone who prioritises pure image quality over convenience features
Avoid if: You need auto-framing, a built-in mic, or a plug-and-play experience. This webcam rewards effort
What to Buy When Free Fixes Aren’t Enough
| Product | Type | Price | Key Spec | Best For |
|---|---|---|---|---|
| Neewer 5″ Ring Light | Light | £18 / ~$20 | 60 LEDs, CRI 95+, USB/battery | Zero-budget first lighting upgrade |
| Logitech Litra Glow | Light | £50 / ~$60 | 250 lumens, TrueSoft diffuser, app control | Professionals wanting set-and-forget desk lighting |
| Elgato Key Light Mini | Light | £80 / ~$100 | 800 lumens, WiFi, 4hr battery | Streamers, dark rooms, anyone needing serious output |
| Logitech Brio 500 | Webcam | £119 / ~$110 | 1080p/30, auto-framing, RightLight 4 | Most people upgrading from a laptop webcam |
| Elgato Facecam MK.2 | Webcam | £130 / ~$130 | Sony STARVIS, 1080p60 uncompressed, HDR | Image quality purists, streamers, content creators |
The Verdict: Which Fix Makes the Biggest Difference?
Start with lighting. Always. In my testing, adding a £50 / ~$60 Logitech Litra Glow in front of a 5-year-old built-in laptop webcam produced a better image than an Elgato Facecam MK.2 in a dim room with no added light. As Digital Camera World confirms in their guide to the best lights for Zoom calls, lighting matters more than camera resolution for video call quality. If your webcam looks bad, fix the light before you replace the camera. It’s the cheaper fix and the more effective one.
Next, fix your settings. Enable HD in Zoom. Turn off soft focus in Teams. Clean your lens. These three things take under 60 seconds and cost nothing. Do them right now.
Buy a light before you buy a webcam. A £18 / ~$20 Neewer ring light transforms a laptop webcam. A £130 / ~$130 Elgato Facecam in bad lighting still looks bad. When your webcam looks bad, the upgrade order that makes sense is: free fixes first, lighting second, webcam last.
If you do buy a webcam: The Logitech Brio 500 at £119 / ~$110 is the right choice for most people: great auto-light correction, useful features, plug-and-play simplicity. The Elgato Facecam MK.2 at £130 / ~$130 wins on pure image quality but demands more effort to set up properly. Still unsure? Our full webcam roundup compares all six top models side by side.
Your webcam is one piece of the puzzle. If your monitor setup is giving you headaches too, our guide to IPS vs VA vs OLED will help you pick the right panel for all-day comfort. And if the whole workspace needs a rethink, start with the complete home office setup guide.
← Back to Ergonomics Hub