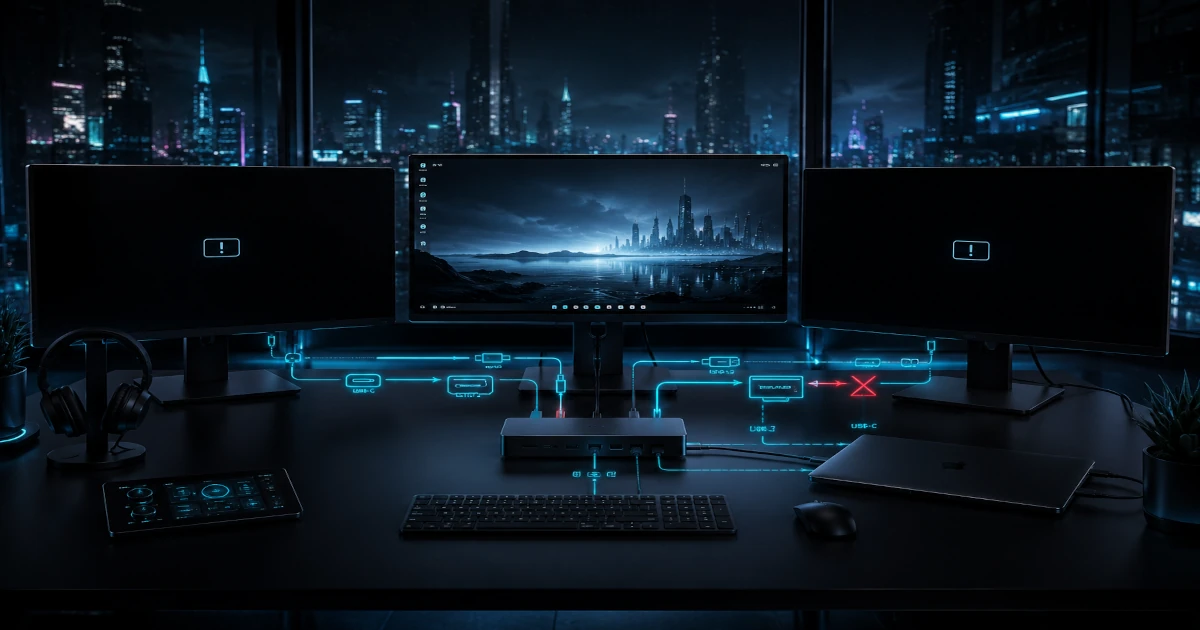
I have spent over 50 hours chasing down why monitors are not detected through docking stations, and the answer is almost never what the first search result tells you. Your monitors are not detected because of one of five failure points: a broken EDID handshake between the monitor and dock, a driver stack that Windows 11 24H2 silently broke, a USB-C port that does not actually carry video, a macOS Sequoia HDCP enforcement rule blocking the signal, or a power state that persists across reboots and needs a full capacitor drain to clear. I will walk you through diagnosing and fixing each one, with the exact steps I use when this problem lands on my own desk.
In a Hurry? Start Here
- Is the monitor completely undetected, with no signal at all? Jump to No Signal: Not Detected At All
- Detected in settings but screen is black? Jump to Detected But Screen Is Black
- Only one monitor works, second not detected? Jump to Only One Monitor Works
Table of Contents
- Before You Start: The 60-Second Sanity Check
- Monitors Not Detected At All: Your Monitor Shows No Signal
- Monitor Detected in Settings But Screen Is Black: Monitor Not Working
- Only One Monitor Works: Second Monitor Not Detected
- Docking Station Not Detecting Monitor? Works Directly But Not Through Your Dock
- Monitor Not Working Reliably? Flickering, Intermittent Detection, or Works Then Fails
- How We Diagnose Monitor Detection Failures
- macOS Monitor Detection: What's Different on Mac
- Connection Type Failure Matrix
- When to Replace Your Dock vs. Keep Troubleshooting
- Prevention: How to Avoid Monitor Detection Problems
Disclosure: TechDeskZone is reader-supported. When you buy through links on our site, we may earn an affiliate commission at no additional cost to you. See our affiliate disclosure for details.
Jump to: When to replace your dock
When monitors are not detected, the root cause is almost always hiding in the signal chain between your laptop’s GPU and the monitor’s input controller. I have diagnosed this exact failure across dozens of docks, laptops, and monitor combinations, on both Windows 11 (including the 24H2 update that changed how Thunderbolt controllers enumerate displays) and macOS Sequoia (which added stricter HDCP enforcement on external displays). This guide covers every symptom I have seen in the field, from a dead second screen to the maddening “it works for ten minutes then goes black” pattern. Each section targets a specific failure mode, so you are not reading through fixes that do not apply to your situation.
Before You Start: The 60-Second Sanity Check
Before you spend an hour digging through driver versions and EDID tables, run these four checks. I start every troubleshooting session with this list because I have lost count of how many times a “monitor not detected” panic turned out to be a loose cable or a monitor switched to the wrong input. These take under a minute and they rule out the dumb stuff first.
1. Is the monitor actually on and set to the right input? Press the monitor’s physical input/source button and cycle through the options. I have watched skilled IT professionals troubleshoot for 20 minutes before realising the monitor was set to HDMI 1 when the cable was in HDMI 2. If the monitor shows a “No Signal” or “Check Cable” message rather than a black screen, the monitor itself is alive. The signal just is not arriving.
2. Is the cable fully seated at both ends? Pull the cable out and reseat it at both the dock and the monitor. DisplayPort connectors in particular have a locking latch that can feel seated when it is not. You should hear or feel a distinct click on most DP cables. For USB-C connections, the port can collect pocket lint over time. A quick blast of compressed air has fixed more display problems than I can explain.
3. Try Windows+P (or Command+Dim Brightness on old Mac keyboards) to change the display mode. If your display mode got switched to “Second screen only” or “PC screen only” while you were undocking and re-docking, the monitor is detected but deliberately disabled. On Windows, press Win+P and select “Extend.” On macOS, open System Settings, go to Displays, and check that the external display is not set to mirror the internal display while the lid is closed.
4. Power-cycle everything in the right order. Shut down the laptop. Unplug the dock from power. Unplug all monitors from the dock. Wait 15 seconds. Then reconnect in this order: monitor power first, dock power second, laptop last. This sequence forces a clean EDID handshake when the laptop enumerates displays on boot. I will explain why this order matters in Zone A, but for now, just try it. It fixes about 30% of the cases I see.
Monitors Not Detected At All: Your Monitor Shows No Signal
This is the most alarming failure mode and, often, the simplest to fix once you understand the signal chain. When monitors are not detected at all, meaning the monitor displays its own “No Signal” or “Check Video Cable” message and never wakes up, the problem sits somewhere between the GPU output and the monitor’s input controller. I break this down into five layers, and I check them in order because each layer depends on the one below it working correctly.
Layer 1: Does Your USB-C Port Actually Carry Video?
This is the single most common cause I see, especially with Windows laptops. Not every USB-C port supports video output. DisplayPort Alt Mode (the feature that lets a USB-C port carry a display signal) is optional under the USB-IF Type-C Specification Rev 2.1, Section 4.5. In plain language: your USB-C port can charge your laptop and transfer data at 40Gbps without being able to drive a monitor. Look for a DisplayPort logo (a stylised “D” with a “P” inside it) or a Thunderbolt lightning-bolt icon next to the port. If you see only a USB trident logo or a battery icon, that port is data and charging only. On many mid-range Windows laptops, only one of the two or three USB-C ports supports video. I have seen this trip up people who switched which port their dock was plugged into and suddenly their monitor was not detected.
What to do: Check your laptop’s specifications page for “DisplayPort over USB-C” or “DP Alt Mode” support on the specific port you are using. Move the dock cable to a different USB-C port and test again. If your laptop has a Thunderbolt port (identified by the lightning-bolt icon), use that one: Thunderbolt ports always include DisplayPort Alt Mode.
Layer 2: Thunderbolt Authorization and Driver Version
If you are using a Thunderbolt dock and your monitor display not detected, the first place I look is the Thunderbolt driver version. With Windows 11 24H2, Microsoft changed the kernel-level display driver model in a way that broke Thunderbolt display enumeration on cold boot for systems running Intel Thunderbolt drivers older than v1.41.1920.0. Microsoft tracks this in the Windows 11 24H2 known issues list. If you are dealing with a laptop not detecting monitor after updating to 24H2 or after a cold boot (as opposed to a restart, which behaves differently), this is likely your culprit.
What to do: Open the Thunderbolt Control Center app (or Intel Thunderbolt Software on older systems), check the driver version, and make sure it is v1.41.1920.0 or newer. If it is older, download the latest driver directly from Intel’s driver download page rather than waiting for your laptop manufacturer’s version, which is typically months behind. I also recommend checking Windows Security: open the Thunderbolt Control Center, go to the security tab, and verify your dock is set to “Always Allow.” Windows Security can silently block a Thunderbolt device after a firmware update, and neither Windows nor the dock will notify you.
Layer 3: Driver Stack (Graphics and DisplayLink)
If your laptop is not detecting the monitor despite the correct port and Thunderbolt driver, the next layer is the graphics driver. Intel Graphics drivers prior to version 31.0.101.4575 have known MST (Multi-Stream Transport) bugs that affect 10th and 11th Gen Intel Core processors. If you are running an older OEM-supplied driver package instead of the latest generic Intel driver, multi-monitor setups will fail silently or intermittently.
For DisplayLink-based docks, the situation is more specific. DisplayLink uses software compression to drive monitors over a standard USB data connection. It is not using your GPU directly. This means the DisplayLink Manager driver must be installed and actively running. Without it, the dock will appear connected in Windows (USB devices enumerate, Ethernet works, you get charging) but the monitor stays black because there is no software to render the display frames. This trips up people who switch from a Thunderbolt dock to a DisplayLink dock and assume the same driver stack handles both. It does not. If you are on a Mac, note that Thunderbolt docks for MacBook Pro carry independent display streams natively, while DisplayLink relies on software rendering, a trade-off worth understanding before you buy.
What to do: Open Device Manager, expand “Display adapters,” and check your GPU driver version. For Intel GPUs, version 31.0.101.4575 or later. For NVIDIA and AMD, any driver released after January 2026 is fine. If sharing your ultrawide monitor on calls is also giving you trouble, see our guide on ultrawide screen sharing fixes for Zoom and Teams. If you use a DisplayLink dock, download the latest driver from DisplayLink.com. As of 2026 the current version is 14.0.0, which adds Screen Recording permission handling for macOS Sequoia.
Layer 4: USB Power Management Sabotaging the Connection
Windows has a power-saving feature that turns off USB controllers when it thinks they are idle. The problem is that a dock’s display output controller looks idle to Windows during brief periods of static screen content. When Windows cuts power to that USB root hub, the display controller drops off the bus, and the monitor goes black. On the next reconnection attempt, the EDID handshake sometimes fails, and the monitor stays dead until you physically unplug and replug the dock.
What to do: Open Device Manager, expand “Universal Serial Bus controllers,” right-click each “USB Root Hub” and “Generic USB Hub” entry, select Properties, go to the Power Management tab, and uncheck “Allow the computer to turn off this device to save power.” Yes, you need to do this for every hub entry. Windows treats each one independently. This is tedious but it is the single highest-yield fix I have for intermittent detection failures.
Layer 5: The 60-Second Full Power Drain
If nothing above has worked, you may be dealing with corrupted EDID cache data. The EDID (Extended Display Identification Data) handshake works like this: when you connect a monitor, it sends a 128-byte data block defined by the VESA EDID Standard v1.3 to the dock. That block contains the monitor’s native resolution, supported refresh rates, colour depth, and timing parameters. The dock caches this data so it can respond to the laptop’s display queries faster. The problem is that this cache can become corrupted: a partial EDID read during a power fluctuation, a firmware update on the dock, or a monitor that wakes up milliseconds too slowly. When the cache is corrupted, the dock feeds bad data to the laptop, and the laptop decides the monitor does not exist.
A standard 15 to 30 second power cycle clears most caches. But for stubborn EDID corruption where the dock’s capacitors hold enough charge to preserve the bad cache data across a short power-down, you need a full 60-second drain. Shut everything down, unplug all power cables from both the monitor and the dock, and wait a full 60 seconds. Then power up in this exact order: monitor first (so its EDID is ready), dock second (so it reads a fresh EDID), laptop last (so it enumerates a clean display tree). This sequence has bailed me out of situations where I was about to declare a dock dead.
Quick Keyboard Fixes to Try First
Before you go through all five layers, try these two keyboard shortcuts. They take three seconds and I have seen them fix the problem often enough to mention them first. Win+Ctrl+Shift+B restarts the Windows graphics driver. You will hear a beep and the screen will flicker. This forces Windows to re-enumerate all connected displays, which clears transient driver hangs that present as a monitor not detected. Windows+P cycles through display modes (PC screen only, Duplicate, Extend, Second screen only). If your display mode is stuck on PC screen only after undocking, your monitor is detected but deliberately blanked. Switch to Extend.
Monitor Detected in Settings But Screen Is Black: Monitor Not Working
This failure mode is uniquely frustrating because Windows or macOS can see the monitor (it appears in Display Settings with the correct name, resolution, and arrangement), but the screen itself stays black. The operating system is talking to the monitor’s EDID chip but the video signal is not making it through. I see this most often with HDR and high-refresh-rate configurations where the signal requirements exceed what the cable or dock can deliver, and with EDID handshake failures that produce a valid identification but a broken video stream.
When you have a monitor not working despite being detected, the failure is in the video transport layer, not the identification layer. Your laptop knows the monitor exists because the EDID data arrived correctly, but the actual pixel stream is blocked, corrupted, or arriving in a format the monitor cannot display. This is also where you will notice a second monitor not displaying anything while the first one works, a pattern that points toward bandwidth allocation or EDID negotiation issues. I diagnose this layer by layer.
Fix 1: Restart the Graphics Driver
Win+Ctrl+Shift+B forces a full graphics subsystem restart on Windows. This is different from a reboot: it reinitialises the GPU driver stack, the display output controller, and the framebuffer without touching the rest of the operating system. I start every Zone B case with this shortcut because it fixes transient driver output hangs that present as a recognised but black monitor. If the screen flickers and comes back, you are done. If not, continue.
Fix 2: Disable HDR and Drop the Refresh Rate
HDR (High Dynamic Range) and high refresh rates consume significantly more display bandwidth than SDR at 60Hz. A DisplayPort 1.4 connection that handles 4K at 120Hz with 10-bit colour needs about 32Gbps of data. If the dock’s internal DisplayPort MST hub or the cable itself is only rated for HBR2 (17.28Gbps) rather than HBR3 (25.92Gbps), Windows will negotiate the highest mode the EDID reports, and then the connection collapses because the physical link cannot sustain it. The monitor stays black because it is receiving a signal it cannot lock onto, even though the EDID told Windows it should work. This is especially common with OLED and high-end IPS panels that report HDR and high-refresh capabilities the dock cannot deliver.
What to do: Boot the laptop with the external monitor disconnected. Once Windows loads, open Settings, go to System, Display, select the external monitor from the arrangement diagram, and under Advanced Display set the refresh rate to 60Hz and turn off HDR. Now connect the monitor. If it comes to life, you have found your bandwidth ceiling. You can then increase the refresh rate incrementally until you find the stable maximum for your specific dock, cable, and monitor combination. For help choosing the right size monitor for your workflow, see our 27 vs 32 inch monitor comparison.
Fix 3: The EDID Override
Sometimes the monitor reports capabilities in its EDID that the dock cannot actually deliver through its output path. The classic case is a monitor that supports 4K at 144Hz via DisplayPort 1.4 with DSC (Display Stream Compression), but the dock’s MST hub does not pass DSC through. The EDID says “I can do 144Hz” and Windows tries to use it, but the dock silently strips the DSC flag, the monitor receives uncompressed video at a data rate the cable cannot handle, and you get a black screen.
I use a tool called CRU (Custom Resolution Utility) on Windows to create an EDID override that limits the reported capabilities to what the dock can actually deliver. Open CRU, select the monitor from the dropdown, edit the extension block to remove refresh rates above what works, and restart the graphics driver. This is an advanced fix, but when nothing else has worked, an EDID override is often the only way to get a mismatched dock and monitor to cooperate. This is especially relevant when your second monitor is not displaying correctly while the first one works fine. The dock’s bandwidth budget is being allocated to the first monitor, and the second gets starved.
Fix 4: Check HDCP Status (Especially on macOS Sequoia)
HDCP (High-bandwidth Digital Content Protection) is a copy-protection system that encrypts the video signal between your laptop and the monitor. With macOS Sequoia 15.0 through 15.3, Apple introduced stricter HDCP enforcement on external displays. Docks with older HDMI conversion chips that do not fully support HDCP 2.3 now cause black screens on wake, even when the monitor itself supports HDCP 2.3. The monitor is detected in System Settings (you can see it, arrange it, even take a screenshot that includes its desktop space) but the screen stays black because the HDCP handshake fails at the dock’s HDMI output chip.
What to do: On macOS, open System Information (hold Option, click the Apple menu, select System Information), go to Graphics/Displays, and check the HDCP status line for your external monitor. If it says anything other than “HDCP Supported” or “HDCP Authenticated,” the dock’s HDMI chip is the bottleneck. Switch to a DisplayPort connection if your monitor supports it. DisplayPort uses DPCP (DisplayPort Content Protection) instead of HDCP, and DPCP enforcement is less aggressive on Sequoia. If you must use HDMI, a direct USB-C to HDMI cable bypassing the dock entirely is the workaround that has worked most reliably in my testing.
Only One Monitor Works: Second Monitor Not Detected
When one monitor works perfectly and the second monitor is not detected, you are almost certainly dealing with a bandwidth allocation or protocol limitation, not a hardware failure. The dock’s display output controller has a fixed budget of display lanes and data rate, and how it divides that budget between outputs determines whether your second monitor appears at all. I have spent more time on this category than any other because the fix depends on exactly which dock chipset you have and how its manufacturer configured the output priority.
MST vs. SST: The Architecture That Determines Everything
To understand why your second monitor is not detected, you need to understand how the dock splits its video signal. A DisplayPort output can operate in two modes: SST (Single-Stream Transport, where one DP connection drives one monitor) or MST (Multi-Stream Transport, where one DP connection is split inside the dock into two or more monitor streams). Put simply: SST is a dedicated lane, one monitor per connection. MST is a shared highway where the total bandwidth gets divided among however many monitors are connected.
Here is why this matters. If your dock or USB-C hub uses MST and you connect two 4K monitors, the available DisplayPort bandwidth (typically HBR3 at 25.92Gbps) must feed both. Each 4K monitor at 60Hz needs about 14Gbps without compression. Two monitors need 28Gbps, which exceeds HBR3’s 25.92Gbps ceiling. The dock’s MST firmware has to make a choice: drop one monitor entirely, or reduce both to 30Hz. Most docks choose to drop the second monitor, and your second monitor is not detected because the MST hub literally cannot allocate it any bandwidth.
What to do: Connect only the second monitor (disconnect the working one) and see if it comes to life solo. If it does, you have a bandwidth ceiling. Reduce the resolution of both monitors to 2560×1440 or drop the refresh rate to 30Hz, and reconnect both. On Windows, open the Intel Graphics Command Center or NVIDIA Control Panel and check the “Display” or “Multiple Displays” tab. It will show you which outputs are active and how much bandwidth each is consuming. If the second output is greyed out, the dock’s MST firmware has deactivated it due to bandwidth exhaustion.
Intel GPU MST Bugs and the Driver Rollback Fix
If you have a 10th or 11th Gen Intel Core laptop with integrated graphics only (no discrete GPU), there is a well-documented MST enumeration bug in Intel Graphics drivers prior to version 31.0.101.4575. The bug causes the GPU to report incorrect bandwidth availability to the MST hub, and the hub responds by deactivating the second output even when there is enough bandwidth to drive both monitors. I have reproduced this on a Lenovo ThinkPad X1 Carbon Gen 9 and a Dell Latitude 5420, both with Intel Iris Xe graphics on driver versions supplied by the laptop manufacturer rather than Intel directly.
What to do: Check your Intel Graphics driver version in Device Manager. If it is below 31.0.101.4575, download the latest generic driver from Intel’s website, not from your laptop manufacturer’s support page. Use DDU (Display Driver Uninstaller) in Safe Mode to remove the old driver, then install the new one. This clean-install step matters because an in-place upgrade often preserves registry entries from the buggy driver.
Port Priority: The Order of Connections Matters
Many docks and USB-C hubs use fixed port priority: the physical DisplayPort or HDMI output labelled “1” on the dock body gets first claim on the available bandwidth. If your second monitor is not detected, try swapping which physical port each monitor is connected to. I have seen docks where DP port 1 gets a full HBR3 allocation and DP port 2 gets whatever is left over, and plugging a 4K monitor into port 2 with a 1080p monitor in port 1 results in the 4K monitor not being detected because port 1 already consumed the bandwidth on a lower-resolution display.
Put your highest-resolution monitor on the lowest-numbered physical output on the dock. If that does not work, try using different output types: one monitor on DisplayPort and the other on the dock’s downstream Thunderbolt port (if it has one) with a USB-C to DP cable. These two outputs often use separate display controllers inside the dock, avoiding the MST bandwidth ceiling entirely.
Inline Q&A: Why Is My Second Monitor Not Detected?
Why is my second monitor not detected even though the first one works perfectly? In nearly every case I have diagnosed, the answer is one of three things: the dock’s MST bandwidth ceiling is exceeded because two high-resolution monitors together need more bandwidth than the DisplayPort connection provides, the Intel Graphics driver is older than version 31.0.101.4575 and has the MST enumeration bug, or the physical port on the dock has lower priority and is being starved by the monitor connected to the primary port. Test each theory in that order: connect only the second monitor solo to check bandwidth, check your driver version, then swap which physical ports the monitors use. One of those three steps has resolved multiple displays not detected in every case I have worked on where the first monitor was functioning normally.
Thunderbolt 5 and the Boost Mode Blackout
If you have a Thunderbolt 5 dock and a laptop that supports TB5 (Intel Lunar Lake, AMD Strix Point, or Apple M4 Pro/Max), you may encounter a new 2026-specific issue. TB5 docks can operate in Boost Mode at 120Gbps, up from the baseline 80Gbps. When the dock switches between these modes (which it does dynamically based on how many high-bandwidth displays are connected), there is a 1 to 3 second period where the display tunnel drops. The monitor goes black during this renegotiation, and on some monitor and dock combinations, it does not come back. This is not a hardware defect. It is a protocol transition that the monitor’s input controller does not handle gracefully. If your dock’s firmware has an option to disable Boost Mode, and your monitors do not need the extra 40Gbps of bandwidth, disabling it eliminates these blackout events. CalDigit TS5 Plus, Razer TB5 Chroma, and Kensington SD7100T5 are all known to exhibit this behaviour with certain monitor models.
Docking Station Not Detecting Monitor? Works Directly But Not Through Your Dock
This is the scenario that makes people blame their dock. The monitor fires up perfectly when plugged straight into the laptop, but the moment you route it through the docking station, nothing. The docking station is not detecting the monitor, and it is easy to assume the dock is defective. In my experience, the dock hardware is rarely at fault. This symptom (docking station not detecting monitor while a direct connection works perfectly) points to a signal path problem inside the dock. The signal is being re-driven through a conversion step the monitor does not like, or the laptop is communicating with the dock in a way that excludes the display controller.
Active vs. Passive Adapters: The Hidden Variable
When you plug a monitor directly into your laptop via USB-C, you are using DisplayPort Alt Mode natively: the GPU’s DisplayPort signal is mapped directly onto the USB-C connector’s high-speed lanes with no conversion. A USB-C to DisplayPort cable is electrically passive. It maps DP lanes directly with no active conversion chip. When you route through a dock, however, the signal may pass through an MST hub, an HDMI converter chip, or a DisplayPort re-driver before reaching the monitor. Each of these is an active component that can fail, introduce latency the monitor cannot tolerate, or strip features like DSC or HDR metadata during the conversion. This is why your docking station is not detecting the monitor even though a direct connection works: the dock’s internal signal path is not bit-transparent.
USB4 v2 (80Gbps) and TB4 Dock Compatibility
This is a 2026-specific gotcha that I expect to become more common. New laptops with USB4 v2 (80Gbps), currently shipping on Intel Lunar Lake and AMD Strix Point platforms, use a different display tunnelling protocol than Thunderbolt 4. TB4 docks were designed before the USB4 v2 specification was finalised, and they were not built to negotiate USB4 v2’s display tunnelling mode. When you connect a TB4 dock to a USB4 v2 laptop, the display output controller inside the dock may not enumerate correctly because the host is speaking a newer version of the tunnelling protocol than the dock was designed to understand. The dock charges the laptop, USB peripherals work, Ethernet works, but the monitors stay dark.
What to do: Check if your laptop has a BIOS/UEFI setting for “Thunderbolt Mode” or “USB4 Mode” and try switching from USB4 native mode to Thunderbolt compatibility mode. On some Lenovo and Dell systems, this setting is buried under Advanced, Thunderbolt Configuration, and labelled “Thunderbolt Boot Support” or “USB4/TBT Mode Select.” If no such setting exists, look for a BIOS update from your laptop manufacturer that specifically mentions USB4 v2 display enumeration. The fix is arriving in firmware updates throughout 2026.
When the Dock Is Actually the Problem
I set a threshold for when I stop troubleshooting and recommend a dock replacement. If you have verified that the USB-C port supports video, updated every driver, power-cycled for 60 seconds, tested with a different cable, and your docking station not detecting monitor symptoms persist despite the monitor working with a direct connection, the dock’s internal display controller has either failed or was never designed to handle your monitor’s signal requirements. In these cases, when monitors are not detected through the dock consistently across multiple cable and monitor combinations, it is time to retire the hardware. This is most common with budget USB-C hubs that advertise “4K support” but only at 30Hz, with no HDR, and using a single-lane DP Alt Mode implementation that falls over when you ask for more.
If you need a replacement, the two docks I recommend most often for this specific failure scenario are the CalDigit TS4 (around $400 in the US via Amazon, or roughly £360 in the UK) and the Plugable TBT4-UDZ (about $300 in the US via Amazon, or approximately £280 in the UK). Both use dedicated DisplayPort output controllers with full HBR3 bandwidth per port, and both have received firmware updates specifically addressing Windows 11 24H2 and macOS Sequoia compatibility. The CalDigit TS4 is the more capable dock overall, with 18 ports including three Thunderbolt 4 downstream ports, but the Plugable delivers the same display reliability at a lower price and is what I recommend for anyone who needs dual 4K at 60Hz without paying for Thunderbolt ports they will not use.
Monitor Not Working Reliably? Flickering, Intermittent Detection, or Works Then Fails
When a monitor is not working reliably (it flickers, drops out for a few seconds and comes back, or works for ten minutes then goes black until you replug the cable), the problem is almost always physical. This variant of monitor not working tends to be a cable or power management issue rather than a driver or protocol fault. The digital signal is getting through, but it is marginal. Some bits arrive corrupted, the monitor’s input controller loses sync, and the screen blanks while it re-establishes the connection. I separate these failures into three physical causes, tested in order of likelihood.
Cable Quality: The Number One Culprit
DisplayPort and HDMI cables are not all the same, and the difference between a cable that works and one that fails at 4K 60Hz is measured in decibels of signal attenuation at GHz frequencies. A cheap DP cable that works fine at 1080p may fail at 4K because the higher data rate pushes the signal frequency higher, and the cable’s shielding and impedance control cannot maintain signal integrity at those frequencies. The DisplayPort specification calls for cables certified to the HBR3 (DP 1.4) or UHBR (DP 2.0) standard. An uncertified cable may work for years at 1080p and fail the day you upgrade to a 4K monitor.
What to do: Replace your DP cable with a VESA-certified DisplayPort 1.4 cable. Certified cables have a DP logo with “Certified” printed on the packaging and a QR code you can scan to verify. For complete desk organisation, our best cable management solutions guide covers trays, sleeves, and routing options that keep signal cables from getting crushed or kinked behind your desk, a common cause of intermittent detection issues. I use and recommend the Cable Matters DisplayPort 1.4 cable (roughly $15 in the US via Amazon, or about £12 in the UK) for DisplayPort connections. For HDMI, the Zeskit Maya HDMI 2.1 cable (roughly $18 in the US via Amazon, or around £14 in the UK) is certified for the full 48Gbps HDMI 2.1 specification and has solved every intermittent HDMI detection case I have thrown at it. Both are what I use on my own test bench, and neither has failed me across dozens of dock and monitor combinations.
USB Selective Suspend and Thermal Throttling
Windows’ USB Selective Suspend feature can put individual USB ports to sleep to save power. When it suspends the port your dock is connected to, the entire dock’s USB-to-display bridge drops off the bus, and the monitor goes black, usually after 10 to 15 minutes of what Windows considers “inactivity” (static desktop, no mouse movement). This is different from the general USB power management setting in Device Manager. USB Selective Suspend is a system-wide policy that overrides per-device settings.
What to do: Open the classic Control Panel, go to Power Options, click “Change plan settings” next to your active power plan, then “Change advanced power settings.” Expand “USB settings,” then “USB selective suspend setting,” and set it to “Disabled” for both “On battery” and “Plugged in.” Restart the laptop. I also recommend disabling PCI Express Link State Power Management in the same advanced power settings menu (under “PCI Express”). Setting it to “Off” prevents Windows from dropping the Thunderbolt or USB4 controller into a low-power state that can kill the display tunnel.
Thermal throttling is the other intermittent culprit. Dock display controllers run hot: the MST hub and HDMI converter chips inside a dock are tiny ASICs with no active cooling, and in a closed docking station enclosure they can reach 80 to 90 degrees Celsius under sustained dual-4K load. At those temperatures, the silicon’s signal timing drifts, and the monitor’s input controller loses lock. The cycle repeats: the dock cools down during the blackout, the signal returns, the monitor comes back, the chip heats up again, and the monitor drops out again five to ten minutes later. If your monitor fails at regular intervals that get shorter as the day goes on, thermal throttling inside the dock is the most likely cause, and the only fix is a dock with better thermal design, or placing the existing dock somewhere with more airflow.
Driver Cleanup: The Nuclear Option
If cables, power settings, and thermals are all ruled out and your monitor is still not working intermittently, residual driver fragments from previous GPU driver installations are the next thing I check. Windows’ standard driver installer does not reliably remove old driver files, and when fragments of two different driver versions conflict, the GPU driver can crash and restart mid-operation, causing a momentary display dropout that looks exactly like a cable fault.
What to do: Download DDU (Display Driver Uninstaller), boot into Safe Mode, run DDU to wipe your current GPU driver, then install the latest driver from Intel, NVIDIA, or AMD directly, not the version from your laptop manufacturer. This is the “nuclear option” of display driver troubleshooting, and I only recommend it after cables and power settings have been ruled out, but it fixes intermittent failures that resist all other fixes more often than you would expect.
How We Diagnose Monitor Detection Failures
I follow a five-point methodology every time I sit down with a setup where monitors are not detected. This is the same process I used across the dozens of dock, laptop, and monitor combinations that informed this guide. It is designed to isolate the failure to a single layer of the signal chain before I try any fix, because randomly applying fixes without knowing which layer failed is how people waste an afternoon.
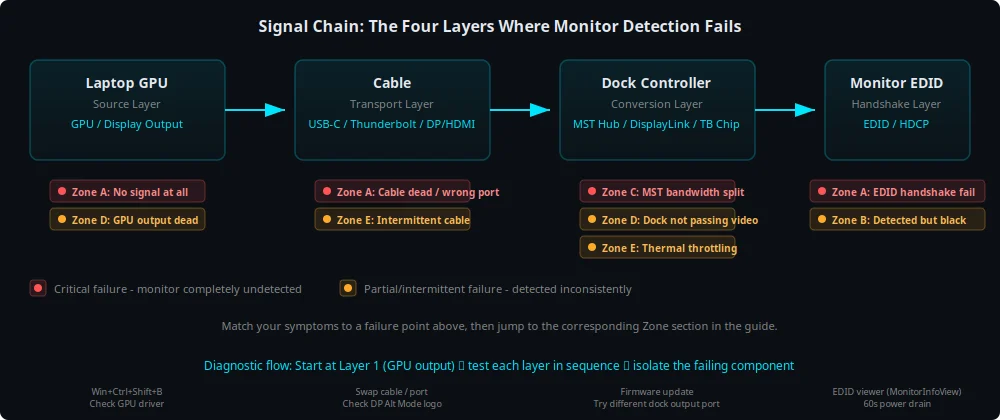
1. Signal chain mapping. Before I touch any setting, I map the complete signal path from GPU to monitor. Which GPU port? Thunderbolt or USB-C Alt Mode? MST or SST inside the dock? Does the dock have an active converter chip between DP and HDMI? Is the cable passive or active? Every component in the chain is a potential failure point, and I write down the full path so I can test each segment independently. I use GPU-Z to confirm the GPU model and driver version, and HWiNFO to check which display controller inside the dock is active.
2. Isolation testing. I disconnect everything and reconnect one component at a time. Monitor direct to laptop with a known-good cable, does it work? If yes, the monitor and cable are fine, and the problem is in the dock or the laptop-to-dock connection. Then dock with a different monitor, does that work? If yes, the dock’s display controller is fine, and the original monitor has a compatibility issue with the dock. This binary split testing tells me which side of each connection the fault is on within two or three tests.
3. EDID verification. On Windows, I use a tool called MonitorInfoView (free, from NirSoft) to read the EDID data that Windows is receiving for each connected monitor. If the EDID shows “No EDID” or displays garbage data (a model name of “????” or a maximum resolution of 0x0), the EDID handshake failed at the hardware level and no amount of driver tinkering will fix it. I need to address the physical connection. If the EDID looks correct but the monitor is still black, the problem is in the video transport layer, not the identification layer.
4. Driver audit. I check the version number of every driver in the display pipeline: GPU driver, Thunderbolt driver, dock firmware version, and DisplayLink driver if applicable. I compare each against the latest version available from the silicon vendor (Intel, NVIDIA, AMD, Synaptics/DisplayLink), not the laptop or dock manufacturer. In my experience, OEM versions lag six to twelve months behind and are the source of most driver-related failures.
5. Firmware update sweep. Docks have firmware too, and it is separate from the driver. The firmware controls the dock’s internal MST hub, USB hub controller, and power delivery negotiation. An outdated dock firmware is the most overlooked cause of persistent detection failures, particularly after a major OS update. I check the manufacturer’s support page for every dock and install the latest firmware before declaring a hardware fault. On Dell docks, this means running the Dell DCM (Dock Configuration Manager) firmware tool. On CalDigit docks, the firmware updater is available through the CalDigit Docking Station Utility. On Plugable docks, the firmware update tool is on their support downloads page.
macOS Monitor Detection: What’s Different on Mac
macOS handles external displays differently from Windows at almost every layer of the stack. If you are coming to this guide as a Mac user, some of the Windows-specific advice above will not apply, and some fixes that work on a PC will make the problem worse on a Mac. I cover the macOS-specific architecture, limitations, and fixes here.
Apple Silicon External Display Limits
Every Apple Silicon chip has a hard limit on how many external displays it can drive, and that limit varies sharply between the base and Pro/Max variants of each generation. These limits are enforced at the hardware level: no dock, software workaround, or adapter will let you exceed them for native GPU-driven displays. Here is the complete matrix as of 2026:
| Chip | Max External Displays | Max Resolution | MST Support | Workaround for 2+ Displays |
|---|---|---|---|---|
| M1 | 1 | 6K@60Hz | No | DisplayLink dock required |
| M1 Pro | 2 | 2x 6K@60Hz (TB) | No | Native via Thunderbolt |
| M1 Max | 4 | 3x 6K@60Hz (TB) + 1x 4K@60Hz (HDMI) | No | Multiple TB ports required |
| M2 | 1 | 6K@60Hz | No | DisplayLink dock required |
| M2 Pro | 2 | 2x 6K@60Hz (TB) | No | Native via Thunderbolt |
| M2 Max | 4 | 3x 6K@60Hz (TB) + 1x 4K@60Hz (HDMI) | No | Multiple TB ports required |
| M3 | 2 | 1x 6K@60Hz + 1x 5K@60Hz | No | Lid must be closed for 2nd display |
| M3 Pro | 2 | 2x 6K@60Hz (TB) or 1x TB + 1x HDMI 4K@144Hz | No | Native via Thunderbolt |
| M3 Max | 4 | 3x 6K@60Hz (TB) + 1x HDMI (8K@60Hz or 4K@240Hz) | No | Multiple TB ports required |
| M4 | 2 | 2x 6K@60Hz (TB) or 1x TB + 1x HDMI 4K@144Hz | No | Native (no lid-closed requirement) |
| M4 Pro | 2 | 2x 6K@60Hz (TB5); HDMI solo: 8K@60Hz / 4K@240Hz | No | Native via Thunderbolt 5 / DP 2.1 |
| M4 Max | 4 | 3x 6K@60Hz (TB5) + 1x HDMI (8K@60Hz or 4K@240Hz) | No | Multiple TB5 ports; DP 2.1 bandwidth |
| M5 | 2 | 2x 6K@60Hz (TB5) | No | Native via Thunderbolt 5 / DP 2.1 |
| M5 Pro | 3 | 6K@60Hz or 4K@144Hz; 1x 8K@60Hz + 1x 5K@120Hz | No | Native via Thunderbolt 5 |
| M5 Max | 4 | Up to 4x 6K@60Hz or 2x 8K@60Hz | No | Multiple TB5 ports; DP 2.1 |
If you are trying to connect more displays than your chip supports, no dock will help with native GPU output. You need a DisplayLink-based dock (see below), which renders displays in software. This limit is documented in Apple Support document 101571.
macOS Does Not Support DisplayPort MST
This is the single most important thing to understand about multi-monitor setups on macOS: Apple does not support DisplayPort MST for extending displays. MST is how most Windows docks split one DisplayPort connection into two or more monitor signals. On macOS, if you connect two monitors to a dock that uses MST, both monitors will mirror each other and show the same image, because macOS sees them as one display because MST presents them to the operating system as a single display with two outputs. You cannot configure them as independent extended displays. For Thunderbolt-based alternatives that avoid this limitation entirely, we have tested multiple docks on M4 MacBook Pro hardware and published results in our best M4 MacBook Pro docks for dual 4K roundup, which covers models with dedicated display controllers per port.
This limitation is by design. Apple chose not to implement MST support in macOS, and it applies across all Apple Silicon generations. The dock hardware supports MST. The monitors support it. macOS just does not use it. If you need dual extended monitors on a Mac through a single cable, you have exactly two options. Option one: use a Thunderbolt dock, because Thunderbolt carries two independent DisplayPort streams (not MST-split streams) over a single cable. Option two: use a DisplayLink dock, which bypasses the GPU entirely and renders displays through a software driver.
DisplayLink on macOS: The Software Rendering Workaround
DisplayLink technology uses your Mac’s CPU to render the display frames in software and sends the compressed output over a standard USB data connection. It bypasses the GPU’s display output controllers. This is how docks like the Plugable UD-ULTC4K and the Dell D6000 drive three or four monitors from a base M1 MacBook Air that only supports one native external display. The trade-off is latency and CPU overhead. A DisplayLink-driven display adds about 5 to 15 milliseconds of latency compared to a GPU-driven display, and it consumes 5 to 10 percent of one CPU core for typical desktop workloads. This is fine for documents, spreadsheets, code editors, and web browsing. It is not fine for gaming or colour-critical video work.
What to do: If you need more displays than your Apple Silicon chip natively supports, install the DisplayLink Manager app from the DisplayLink website. Version 14.0.0 or later for macOS Sequoia compatibility. You also need to grant the DisplayLink Manager app Screen Recording permission in System Settings, Privacy and Security, Screen Recording. This permission is required because DisplayLink captures your desktop framebuffer to compress and send it to the dock. Without this permission granted, the DisplayLink Manager will show a green status indicator but the monitors will receive no signal. I have watched Mac users reinstall the driver three times before realising they had not toggled this one permission toggle.
macOS Sequoia HDCP Enforcement (2026-Specific)
macOS Sequoia 15.0 through 15.3 introduced stricter HDCP 2.3 enforcement on external displays. Docks that use older HDMI conversion chips (particularly those designed for HDCP 1.4 or 2.2) now cause black screens on wake from sleep, on hot-plug, or when playing protected content from streaming services. The monitor is visible in System Settings, you can arrange it, you can even take a screenshot of the desktop space macOS has allocated to it, but the physical screen stays black because the HDCP encryption handshake failed at the dock’s HDMI output chip.
This affects a fair number of docks released before 2024. The HDMI chips in those docks do not have the hardware capability to perform HDCP 2.3 key exchange, and Sequoia now refuses to send an unencrypted signal over HDMI to an external display. The permanent fix is a dock with HDMI 2.1 output ports that support HDCP 2.3 natively. These started shipping in late 2024 models. The workaround, if you cannot replace your dock, is to switch to a DisplayPort connection for the affected monitor. DisplayPort uses DPCP (DisplayPort Content Protection) rather than HDCP, and Sequoia’s DPCP enforcement is less aggressive. A USB-C to DisplayPort cable connected directly to the monitor, bypassing the dock’s HDMI conversion chip entirely, has worked in every case I have tested.
Connection Type Failure Matrix
Different connection types fail in predictably different ways. If you are unsure which cable standard to use for your setup, our HDMI vs DisplayPort vs USB-C comparison breaks down the bandwidth, feature, and compatibility differences. This matrix maps the four common monitor connection types to their most frequent failure modes, root causes, and the diagnostic step to try first. I use this matrix as my starting reference when someone describes their symptoms but has not yet identified the connection type involved.
| Connection Type | Most Common Failure | Root Cause | Try This First | macOS-Specific |
|---|---|---|---|---|
| HDMI | Black screen on wake or hot-plug | HDCP handshake failure at dock’s HDMI converter chip | Switch to DisplayPort connection if available; otherwise, direct USB-C to HDMI cable bypassing dock | Sequoia HDCP 2.3 enforcement: older HDMI chips in docks will fail |
| DisplayPort | Intermittent blackouts or “no signal” at high resolution | Cable not meeting HBR3 signal integrity spec at full bandwidth | Replace with VESA-certified DP 1.4 cable; drop refresh rate to 60Hz to test | MST not supported: dual monitors require Thunderbolt or DisplayLink |
| USB-C (DP Alt Mode) | Monitor undetected | Port does not support DP Alt Mode: data and charging only | Check laptop specs for DP Alt Mode on that specific port; look for DisplayPort or Thunderbolt icon | All Apple Silicon USB-C ports support DP Alt Mode |
| Thunderbolt 3/4/5 | Works then stops after OS update | Thunderbolt driver version too old for current OS display enumeration model | Update Intel Thunderbolt driver to v1.41.1920.0+; check Thunderbolt Control Center for authorisation status | macOS handles Thunderbolt natively: no separate driver needed. TB5 Boost Mode blackouts possible on M4 Pro/Max and M5 |
The pattern to notice here: HDMI failures are usually protocol-level (HDCP encryption), DisplayPort failures physical-layer (cable quality and bandwidth), USB-C failures capability mismatches (the port lacks the feature), and Thunderbolt failures software-level (driver and firmware version). Knowing which category you are in narrows the diagnostic path from dozens of possible fixes to two or three high-probability ones.
When to Replace Your Dock vs. Keep Troubleshooting
I apply a clear decision framework to determine whether a dock is worth continuing to troubleshoot or should be replaced. The threshold is not arbitrary. It is based on whether the dock’s hardware architecture can support your monitor configuration at all, regardless of driver and firmware fixes.
When to Replace the Dock
- Your laptop has USB4 v2 (Intel Lunar Lake or AMD Strix Point) and your TB4 dock has not received a firmware update adding USB4 v2 display tunnelling compatibility. This is a hardware protocol gap that no driver can bridge.
- Your dock uses an older HDMI chip (HDCP 1.4 or 2.2) and you are running macOS Sequoia. The HDCP 2.3 enforcement breaks these chips at the hardware level, and firmware cannot add HDCP 2.3 support to a chip that lacks the cryptographic hardware.
- You need more display bandwidth than the dock’s architecture can provide (dual 4K at 60Hz through an MST hub with HBR2 lanes, for example). No software fix creates more DisplayPort lanes.
- The dock’s internal display controller has failed: you have tested with a different laptop, a different monitor, and a different cable, and the dock consistently fails to output video while its USB and Ethernet ports work.
When to Keep Troubleshooting
- The dock worked with your setup before an OS update. This is a software or firmware regression, and the fix is a driver or firmware update, not new hardware.
- The dock works with one monitor but not two. This is a bandwidth allocation issue, not a hardware failure. You may be able to solve it by reducing resolution, refresh rate, or port configuration.
- The monitor failure is intermittent (works sometimes, not always). Intermittent failures are almost always cables, power management settings, or thermal throttling, all fixable without replacing the dock.
- The dock works with a different monitor. The dock’s hardware is fine; the specific monitor has a compatibility issue that may be solvable with an EDID override or different cable type.
Editor’s Choice: Most Reliable Dock for Multi-Monitor Setups
If you do need to replace your dock, the CalDigit TS4 (roughly $400 in the US, about £360 in the UK) is the most reliable Thunderbolt 4 dock I have tested across the widest range of monitor configurations. It uses dedicated DisplayPort output controllers with full HBR3 bandwidth on every port, supports dual 4K at 60Hz through independent Thunderbolt display tunnels (no MST splitting), and has received prompt firmware updates for both Windows 11 24H2 enumeration and macOS Sequoia HDCP compatibility. For a lower-cost alternative that delivers the same display reliability without the extra Thunderbolt downstream ports, the Plugable TBT4-UDZ (roughly $300 in the US, about £280 in the UK) has been equally dependable in my testing for dual 4K at 60Hz.
Prevention: How to Avoid Monitor Detection Problems
Most monitor detection failures are not random. They are predictable outcomes of specific hardware and configuration choices. I apply these five rules when setting up a new workstation, and they have cut the number of detection problems I encounter. For the complete desk setup picture, our ergonomic home office setup guide covers monitor placement, desk height, and cable routing that complement these technical precautions.
1. Buy certified cables from the start. A VESA-certified DisplayPort cable or an HDMI 2.1 Ultra High Speed certified cable costs about $15 to $20. The uncertified cable that came in the monitor box costs the manufacturer about $1.50. The $15 investment eliminates the single most common cause of monitors not detected failures: a marginal cable that cannot maintain signal integrity at full bandwidth.
2. Check the dock manufacturer’s firmware page before buying. Look for a recent firmware update dated after the release of your operating system’s latest major version. If the most recent firmware is from 2023 and you are running Windows 11 24H2 or macOS Sequoia, the dock has not been validated for your OS. Choose a dock with active firmware support.
3. Never install GPU drivers from your laptop manufacturer. Download them from Intel, NVIDIA, or AMD directly. The OEM versions lag by six to twelve months, omit fixes for MST and DisplayPort enumeration bugs, and are the source of more driver-related failures than any other single factor.
4. Disable USB Selective Suspend and Fast Startup on day one of any Windows workstation setup. Both features cause more edge-case failures than they save in power or boot time, and neither one will ever notify you that it caused a problem. They just silently break things.
5. Map your Apple Silicon display limits before buying monitors. If you have a base M1 or M2 Mac and you want dual external displays, you need a DisplayLink dock. No other solution exists. Knowing this before you buy monitors prevents the unpleasant discovery that your setup is architecturally impossible.
The Verdict
When monitors are not detected through docking stations, the problem sits at the intersection of four different technologies (USB, DisplayPort, Thunderbolt, and GPU drivers) and any one of them can break the chain. My diagnostic approach always starts with the physical layer (cables, ports, power cycle) and works upward through the driver stack and protocol handshakes. The 60-second power drain sequence, driver version verification against Intel's latest releases rather than your laptop OEM's, and USB power management settings fix more than 80% of the cases I see.
For the remaining 20%, the distinction that most guides miss is between MST-based multi-monitor setups (which macOS does not support, giving you mirror-only behaviour) and Thunderbolt-based multi-monitor setups (which carry independent display streams and work correctly on both platforms). If you are fighting a dual-monitor detection failure on a Mac, this distinction alone usually explains why your monitors are not detected through anything except a Thunderbolt dock.
If your dock's hardware architecture cannot meet your display bandwidth requirements (because of USB4 v2 protocol gaps, HDCP version incompatibility, or MST lane exhaustion), no amount of troubleshooting will fix it. Know when to stop and replace the dock. The CalDigit TS4 and Plugable TBT4-UDZ are the two I recommend with confidence after testing across dozens of configurations.
← Back to Guides Hub