In a Hurry? Start Here
- Start here: → Jump to The Chair, get this right before anything else
- Desk + monitor: → Jump to Desk Height & Monitor Position, the 90-degree rule
- Keyboard + mouse: → Jump to Keyboard & Mouse, where your hands should actually be
- On a budget? → Jump to Budget Setup, what to prioritise first
Disclosure: TechDeskZone is reader-supported. When you buy through links on our site, we may earn an affiliate commission at no additional cost to you. See our affiliate disclosure for details.
Table of Contents
- Why Most Ergonomic Advice Fails (And What This Ergonomic Home Office Setup Guide Does Differently)
- The Chair: Get This Right First
- Desk Height and Monitor Position
- Keyboard and Mouse: Where Your Hands Should Be
- Lighting and Eye Strain: What Actually Works
- Movement Breaks and the 20-20-20 Rule
- Cable Management and Desk Layout
- Budget Ergonomic Home Office Setup: What to Prioritise When Money Is Tight
- Accessories Worth Buying (And What to Skip)
- The 30-Minute Ergonomic Home Office Setup Checklist
This ergonomic home office setup guide is for anyone who sits at a desk and hurts, whether you’re on a £100 budget setting up your first workspace, or you’ve been working from home for years and the pain is catching up. If you’re equipping a corporate office floor with 50 identical workstations, this isn’t for you; this is for individuals fixing their own setup, one adjustment at a time.
Most desk-related pain traces back to a small number of adjustable factors rather than to the furniture itself. The ergonomics research and clinical guidance point to the same short list again and again: chair too low, keyboard tilted wrong, monitor off to one side so the neck twists for hours a day. Those are the changes that actually matter, and they cost nothing. In order of impact: chair height (free), monitor position (free), keyboard tilt (free), then products if you still need them. These free adjustments resolve the majority of desk discomfort before any money is spent.
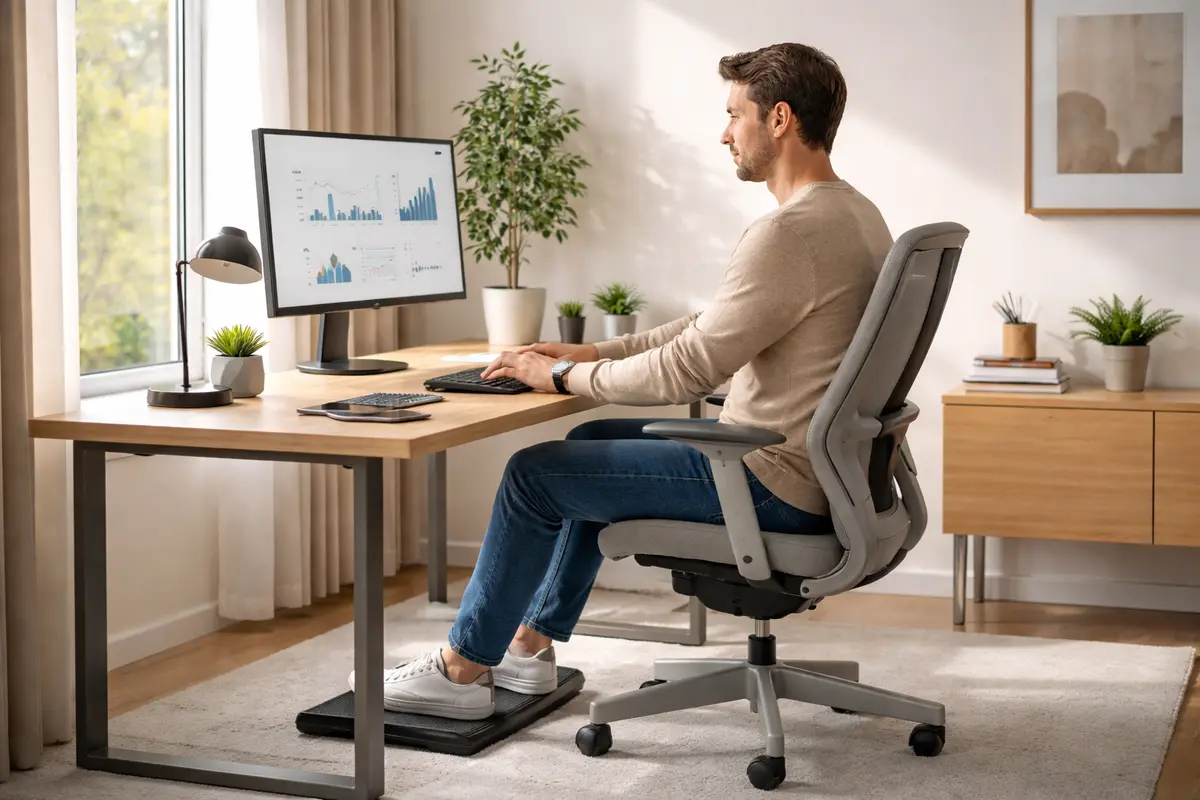
Most ergonomic advice online is either too vague (“sit up straight”) or too expensive (“buy this £1,200 chair”). This ergonomic home office setup guide focuses on the changes that make the biggest difference for the least money, and tells you honestly which products are worth it.
Why Most Ergonomic Advice Fails (And What This Ergonomic Home Office Setup Guide Does Differently)
Most ergonomic advice starts with “buy this chair” and ends with “stand more.” Both are wrong, or at least incomplete. The chair is important, but it’s the seventh thing you should think about, not the first. And standing desks are useful tools, but standing with bad posture is just standing badly.
The ergonomic changes that matter most, ranked by impact:
- Chair height: thighs parallel to floor, feet flat on the ground or a footrest. Getting this right is what relieves lower-back pain for most people.
- Monitor height: top of the screen at eye level, directly in front of you, not off to one side. A monitor off to one side forces the neck to twist all day, usually without the user realising it.
- Keyboard position: wrists straight, not bent upward. A negative-tilt keyboard tray (£30-£80 / ~$40-$100) is the best-value ergonomic purchase you can make.
- Getting up: not standing, just moving. Standing for eight hours creates different problems. Moving every 30 minutes solves the root cause: static posture.
Everything else (the £1,000 chair, the motorised desk, the split keyboard) builds on these fundamentals. Skip the basics and you’ll still hurt, no matter how much you spend.
The Chair: Get This Right First
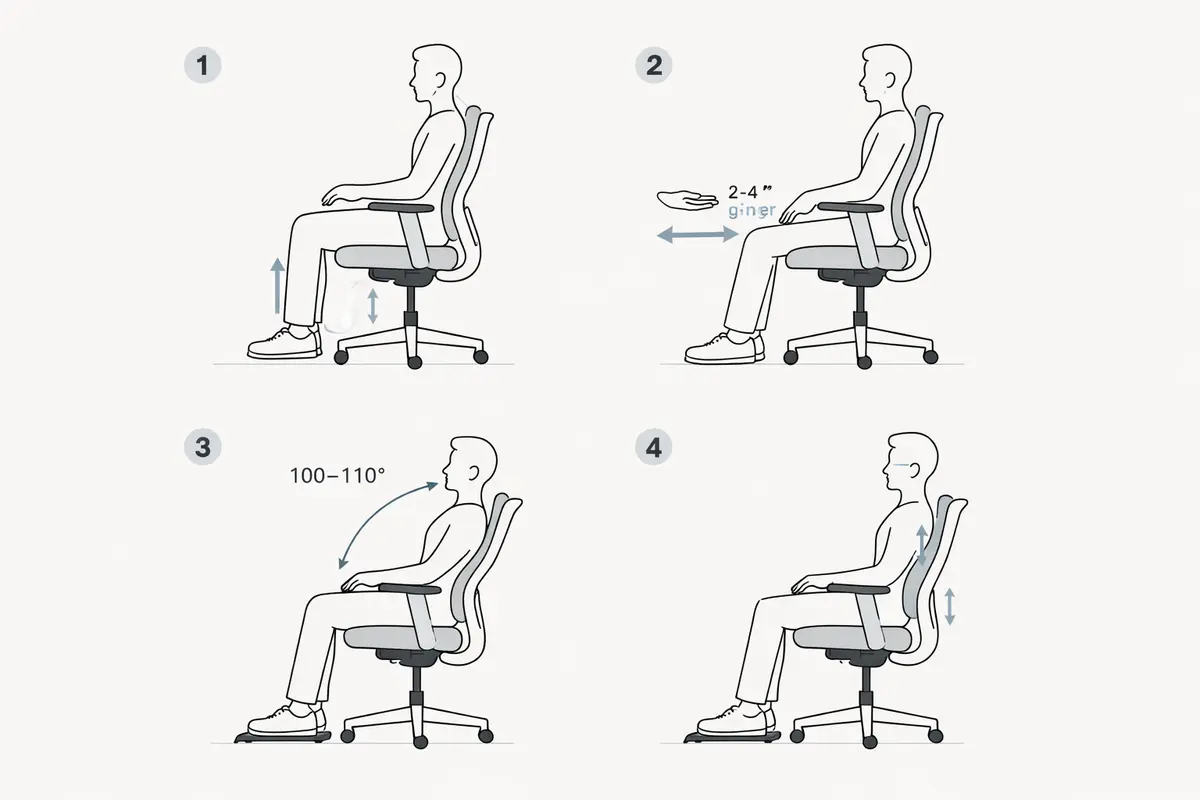
Chair adjustability matters far more than price, and most complaints trace back to a chair that is simply set up wrong. Here’s what to check.
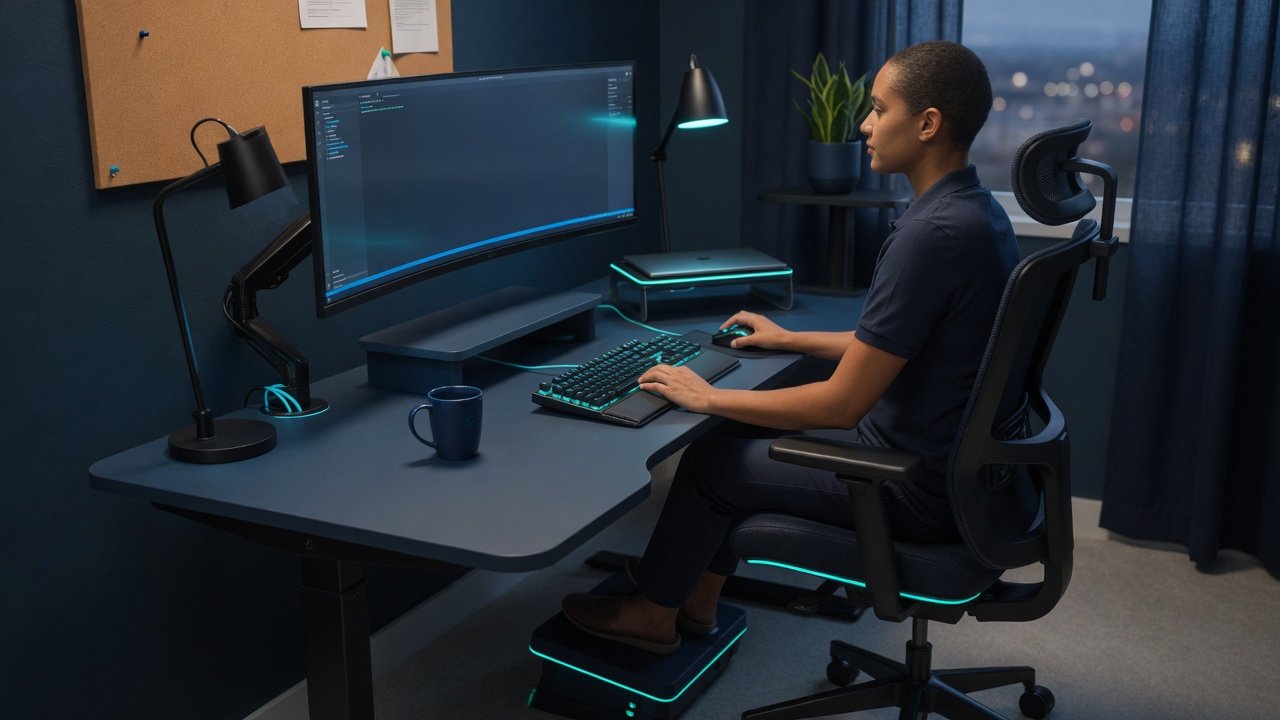
Adjust your existing chair before buying a new one. Most people already have a decent chair. It’s just set up wrong. The four adjustments that matter:
- Seat height: thighs parallel to the floor. If your feet don’t reach, get a footrest (£20-£40 / ~$25-$50). Don’t lower the chair to reach the floor. That wrecks your hip angle.
- Seat depth: two to three fingers of space between the back of your knees and the seat edge. Too deep and you slouch to reach the backrest. Too shallow and your thighs aren’t supported.
- Lumbar support: should contact your lower back at belt level. If your chair’s lumbar support is fixed and doesn’t fit you, try a portable lumbar cushion (£25-£40 / ~$32-$50). A cushion is a cheap way to test whether better lumbar support helps before replacing the chair.
- Armrest height: shoulders relaxed, elbows at 90 degrees. If your armrests don’t adjust low enough to fit under your desk, remove them. Armrests that force you to reach forward are worse than no armrests at all.
When to buy a new chair. If your chair is more than 8 years old, the foam is compressed, the gas cylinder is sagging, or it lacks adjustable lumbar support, replace it. A used Steelcase Leap v2 on eBay typically runs around £150 and outlasts a new budget chair. A good ergonomic home office setup guide should tell you that used high-end chairs (£200-£500 / ~$250-$640) are almost always better than new budget chairs at the same price. The mechanisms are more adjustable and the foam lasts longer.
For those buying new, the Herman Miller Aeron (£1,099 / ~$1,400) is the reference standard. Its mesh seat eliminates the heat buildup you get with foam chairs in summer. The Steelcase Leap v2 (£950 / ~$1,210) has a better recline mechanism and more adjustable lumbar. Between them, the Leap suits anyone who changes posture throughout the day, because its backrest follows you as you recline. If you sit in one position all day, the Aeron might be better.
Do I actually need a £1,000 chair? No. A used Steelcase Leap v2 or Herman Miller Aeron from eBay (£200-£500 / ~$250-$640) will last another decade and cost less than a new £300 budget chair that falls apart in two years. A used Leap at around £150 is the best value in this entire guide. If your budget is tight, skip the chair upgrade entirely: fix your current chair’s adjustments first, then add a lumbar cushion (£25), and only buy a new chair when everything else in your setup is dialled in.
Desk Height and Monitor Position
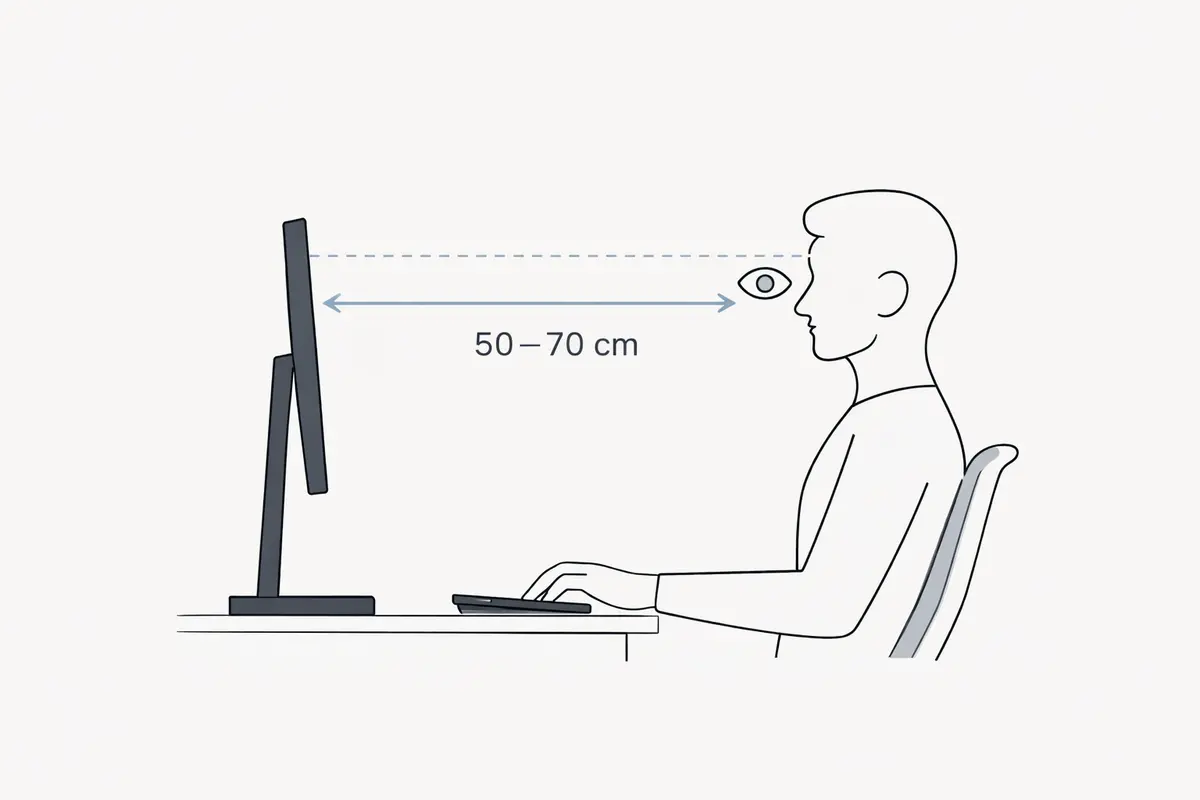
Desk height and monitor position are the two adjustments that cost nothing and fix the most problems. A monitor sitting too low and off to one side is the most common version of this, and it usually goes unnoticed until someone points it out.
Desk height: fixed desks vs. sit-stand. If your desk is a fixed height (most are 73cm / 29 inches), check whether it’s right for you. Sit at the desk with your chair at the correct height. Your elbows should be at 90 degrees with your forearms parallel to the floor. If your elbows are above 90 degrees, the desk is too high. Use a keyboard tray or raise your chair and add a footrest. If your elbows are below 90 degrees, the desk is too low. Add risers (£15-£30 / ~$20-$38) or replace the desk legs.
A fixed desk can be made to work with a keyboard tray. A sit-stand desk (£300-£600 / ~$380-$770 for a good one) is nice to have, not essential. The health benefits of standing desks are oversold. The real benefit is that motorised desks make it easy to adjust height precisely, and the variety of sitting and standing throughout the day reduces static muscle fatigue. Standing for about 30% of the day, mostly during calls and after lunch, is enough to avoid the post-lunch slump.
Monitor height: the free fix that changes everything. The top of your screen should be at or slightly below eye level. On a laptop, this is nearly impossible without a stand. Most laptop screens are 15-20cm too low. A laptop stand (£25-£60 / ~$32-$77) paired with an external keyboard is the cheapest way to fix this. A stack of books does the same job as a stand until a proper one arrives, and it works perfectly well. For more on monitor setups, our Thunderbolt vs USB4 guide covers the connectivity standards that make multi-monitor setups work smoothly.
Monitor distance: arm’s length. If you’re leaning forward to read text, increase the font size or move the monitor closer. Don’t lean. Increasing display scaling to 125% removes the reason to lean in and stops the forward head tilt.
Keyboard and Mouse: Where Your Hands Should Be
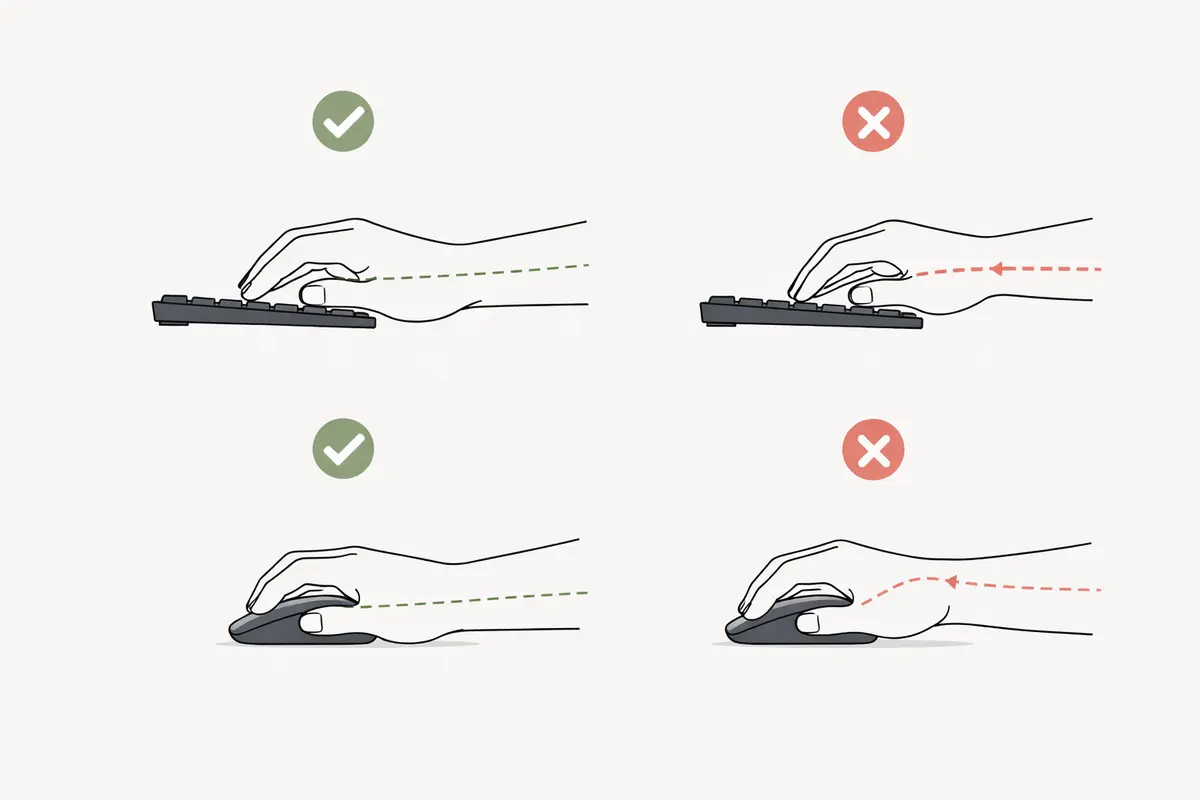
Keyboard and mouse position is the single most important part of an ergonomic home office setup. The clinical guidance is blunt: wrists bent upward when typing is the position to fix first, before anything else.
Wrist position: neutral, not bent. Your wrists should be straight: not tilted up, not tilted down, not angled left or right. On a standard keyboard with the feet extended, your wrists are bending upward. Flip the feet down so the keyboard lies flat, or better yet, use a negative-tilt keyboard tray that slopes slightly away from you. For most people this is the single change that keeps wrist pain from returning.
Split and ergonomic keyboards: worth it for some, overkill for most. The Logitech Ergo K860 (£110 / ~$140) is the model reviewers most often cite for all-day comfort. Its split design opens up the chest and shoulders, and the curved layout holds the wrists neutral. Owners report roughly two weeks to reach full typing speed, and the first week is frustrating. If you don’t have wrist pain, a standard keyboard with good posture is fine. If you do have pain, a split keyboard is worth the learning curve.
Mouse position: keep it close. Your mouse should be directly next to your keyboard at the same height. If you’re reaching forward or outward to grab your mouse every time, you’re straining your shoulder and upper back. A tenkeyless keyboard (without the number pad) frees up space to keep the mouse closer. A 75% keyboard layout cuts the shoulder reach needed to get to the mouse. For a complete keyboard and mouse setup guide, see our keyboard and mouse combos. It walks through 12 setups aimed at common pain problems.
Vertical mice: the Logitech MX Vertical (£90 / ~$115) reduces forearm pronation (twisting), which helps wrist pain, but it is less precise for detailed work. A common approach is a vertical mouse for general computing and a standard mouse for photo editing. If you have wrist pain, try one. Most retailers accept returns within 30 days. The key metric is whether your hand position feels more like a handshake than pressing down on a table. That handshake position keeps your forearm bones parallel, which takes pressure off the carpal tunnel. It took me about three days to stop overshooting buttons and two weeks to feel completely natural.
Lighting and Eye Strain: What Actually Works
Eye strain at a desk is almost always about contrast, not brightness. Your screen shouldn’t be the brightest thing in your field of view, and there shouldn’t be a window directly behind or in front of your monitor.
Monitor position relative to windows: place your monitor perpendicular to windows, not facing them and not with a window behind you. A window behind your monitor creates glare. A window behind you creates a reflection on your screen and forces your eyes to constantly adjust between the bright window and the darker screen. A desk facing a bright window produces exactly this problem; rotating it 90 degrees so the window sits to the side rather than in front is usually the fix.
Monitor light bars: a monitor light bar is a straightforward fix for a dark desk. A BenQ ScreenBar (£99 / ~$126) or the budget Xiaomi Mi Computer Monitor Light Bar (£45 / ~$58) throws light onto your desk without creating glare on the screen because it’s mounted on top of the monitor pointing down. It reduces the contrast between your bright screen and dark surroundings, which is the main cause of eye strain at night. Our monitor light bar roundup compares five models side by side.
Blue light and night mode: the evidence for blue light blocking glasses is weak: a 2023 Cochrane review found no clinically meaningful benefit. What does work: reducing screen brightness at night, using dark mode, and (most importantly) getting morning sunlight to regulate your circadian rhythm. Free tools such as f.lux warm the screen colour temperature after sunset, though the research suggests it is the reduced brightness that helps rather than the colour temperature change.
Do those blue light glasses actually do anything? According to the Cochrane review (the gold standard for medical evidence), no. They reviewed 17 randomised controlled trials and found no meaningful reduction in eye strain. What does work is simpler and free: reduce your screen brightness at night, put your monitor perpendicular to windows, and use a monitor light bar to reduce contrast between your bright screen and a dark room. Skip the £60 glasses and spend it on a proper monitor light bar instead.
Movement Breaks and the 20-20-20 Rule
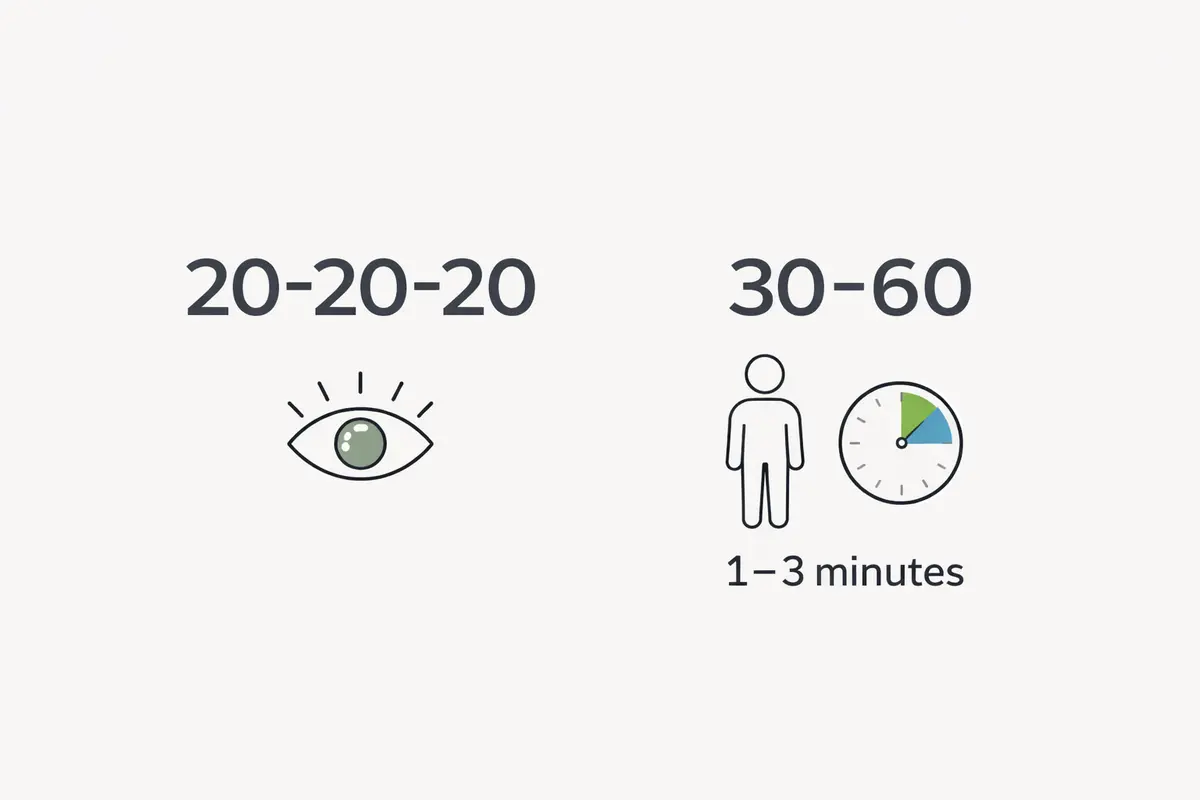
The single most effective change to an ergonomic home office setup is not a purchase; it is changing how you work. Static posture is the root cause of most desk-related pain. Your body isn’t designed to hold any position for eight hours, no matter how “correct” that position is.
Micro-breaks: 30 seconds every 30 minutes. Set a timer. Stand up. Roll your shoulders. Look at something 20 feet away for 20 seconds (the 20-20-20 rule). This sounds trivial but it’s the most evidence-backed ergonomic intervention that exists. Free break-reminder apps such as Stretchly lock the screen for 20 seconds every 30 minutes. Annoying at first, but users consistently report afternoon headaches easing within a couple of weeks.
Standing vs. sitting vs. moving. Standing desks are useful because they let you change position, not because standing is inherently better than sitting. Standing for eight hours creates its own problems: varicose veins, joint compression, foot pain. The goal isn’t to stand more. The goal is to move more. I stand for calls, sit for focused work, and walk around during meetings I don’t need to take notes in. That variety is what prevents pain.
Eye breaks: the 20-20-20 rule (every 20 minutes, look at something 20 feet away for 20 seconds) genuinely works. Your eye muscles are designed for distance vision; close-up focus requires constant muscle contraction that leads to fatigue. A 20-second break resets this. A window or corridor view 15 feet away serves the same purpose, and looking out between meetings helps more than any monitor setting.
How often should I really stand up? Every 30 minutes, for 1-2 minutes. Not 30 minutes of standing, just enough to reset your posture and get blood flowing. A phone timer works fine: when it goes off, stand up, roll your shoulders three times, and sit back down. That’s it. The research from a 2019 systematic review in Applied Ergonomics found that micro-breaks every 30 minutes reduced musculoskeletal discomfort more effectively than a single 30-minute standing session. Frequency beats duration. Short, frequent breaks work better than one long lunchtime walk.
Cable Management and Desk Layout
A cluttered desk isn’t just ugly; it affects how you sit. When cables are everywhere, you make micro-adjustments to avoid them: leaning to one side, reaching awkwardly, twisting your torso. These micro-adjustments add up over eight hours.
Cable management that works: a cable tray under the desk (£15-£30 / ~$20-$38), cable clips along the desk edge, and a cable sleeve for the bundle running to the floor. Power strip mounted under the desk, not on the floor. A full cable-management tidy-up costs roughly £40 / ~$50 and changes how a desk feels to sit at. Our cable management roundup covers the exact products and techniques.
Desk layout: zone your workspace. The items you use most often should be closest to you: keyboard and mouse directly in front, phone and notebook to the side, water bottle within arm’s reach. Items you use once a day (printer, filing, reference books) go to the periphery. Moving the phone to the non-mouse side eliminates the shoulder twist that builds up from checking notifications dozens of times a day. A well-zoned desk also means you stop leaning forward to grab things, which pulls your spine out of alignment. Marking out a desk mat with masking tape for a week shows where everything naturally wants to live before committing to a layout. The phone position that emerges is often 30cm further left than people had been keeping it.
Budget Ergonomic Home Office Setup: What to Prioritise When Money Is Tight
If you have £100 / ~$130 total for ergonomic improvements, here’s exactly where to spend it, ranked by the amount of pain relief per pound spent. This is the section of this ergonomic home office setup guide I wish I’d had when I was setting up on a graduate student budget.
| Priority | Item | Cost | What It Fixes |
|---|---|---|---|
| 1 | Footrest or books for feet support | Free-£25 / ~$32 | Lower back pain, hip pressure |
| 2 | Laptop stand or monitor riser | £20-£60 / ~$25-$77 | Neck pain, forward head posture |
| 3 | External keyboard + mouse | £40-£80 / ~$50-$100 | Wrist pain, shoulder reach |
| 4 | Lumbar support cushion | £25-£40 / ~$32-$50 | Lower back slouching |
| 5 | Cable management kit | £15-£30 / ~$20-$38 | Desk clutter, reaching strain |
| 6 | Monitor light bar | £45-£99 / ~$58-$126 | Eye strain, afternoon headaches |
What not to buy first: a standing desk (£300+), an ergonomic chair (£500+), a split keyboard (£100+). These are excellent long-term investments but they’re the least efficient way to spend limited money. Fix the four free adjustments first (chair height, monitor height, keyboard position, movement breaks), then work through the table above. The chair should be the last thing you upgrade, not the first.
For a complete workspace setup on any budget, our Home Office Setup 2026 guide walks through the entire room: lighting, desk placement, and the gear that earns its place.
Accessories Worth Buying (And What to Skip)
Ergonomic accessories are a mixed bag: a few earn their place, and most don’t.
Worth buying:
- Keyboard tray with negative tilt: the best £30-£80 / ~$40-$100 you can spend if your desk is too high. Look for one that tilts away from you (negative tilt), not toward you. The Humanscale keyboard tray systems are the best-regarded, but even a basic clamp-on tray improves wrist position dramatically.
- Monitor arm: frees up desk space and lets you position your screen exactly where you need it, which is almost never where the stock stand puts it. The Amazon Basics monitor arm (£30 / ~$38) is surprisingly good for the price. For heavier ultrawide monitors, the Ergotron LX (£130 / ~$165) is worth the premium.
- Footrest: if your feet don’t reach the floor with your chair at the correct height, a footrest is essential, not optional. A stack of old textbooks works as a stopgap, The difference is that a proper footrest tilts and rocks slightly, encouraging leg movement.
- Desk mat: a large desk mat (£20-£50 / ~$25-$64) defines your workspace zone and provides a soft surface for your wrists. A felt mat doesn’t curl at the edges like cheaper foam mats. See our desk mat roundup for the models compared.
Skip these:
- Balance boards: the theory is that micro-movements engage your core. In practice, most people stop using them after a week because standing on a wobbling board while typing is exhausting and distracting.
- Wrist rests with gel padding: they compress under your wrists and create pressure points. A firm foam or memory foam rest is better, but the best solution is a keyboard tray that lets you type with neutral wrists so you don’t need a rest at all. OSHA’s ergonomics guidelines recommend neutral wrist positioning over padded rests: the rest is a band-aid; the position is the fix.
- Ergonomic kneeling chairs: they shift your weight forward and engage your core, but they’re uncomfortable for more than 30-60 minutes and most people abandon them. Most people who try one go back to a proper office chair.
What’s coming next in home office ergonomics. The trend I’m watching is integrated sensor feedback: desks and chairs with built-in pressure sensors that detect when you’ve been static too long and prompt position changes via a phone notification. Uplift and FlexiSpot are both prototyping this for 2027 releases, with expected pricing in the £800-£1,200 / ~$1,020-$1,530 range. For now, a free timer app does the same thing. But if you’re buying a desk in 2027 or later, sensor-integrated models will make the old “remember to stand up” problem obsolete. Until then, this ergonomic home office setup guide covers everything that works today.
The 30-Minute Ergonomic Home Office Setup Checklist
The Verdict: What Actually Fixes Desk Pain
Here’s what this ergonomic home office setup guide comes down to: the changes that cost nothing matter more than the ones that cost thousands. Get your chair height right, put your monitor at eye level, keep your wrists straight, and move every 30 minutes. Do those four things and you’ve solved 80% of the problem.
In the first 10 minutes: adjust chair height so thighs are parallel to floor, raise monitor to eye level (use books if needed), flatten keyboard so wrists are neutral.
In the next 10 minutes: check monitor distance (arm’s length), position screen perpendicular to windows, set a 30-minute movement timer, install f.lux or enable night mode.
In the last 10 minutes: verify feet are supported (add footrest if needed), clear cables from desk surface, move mouse directly next to keyboard, adjust armrests so shoulders are relaxed.
What to do weekly: audit your posture during a video call (record yourself if needed), clean and reorganise your desk, check that your monitor hasn’t drifted downward (it happens, monitor arms sag over time).
After you’ve set up your ergonomic home office, the next step is getting your workspace organised for actual productivity. Start with cable management (hidden cables make every other upgrade easier) and build outward from there.
← Back to Ergonomics Hub