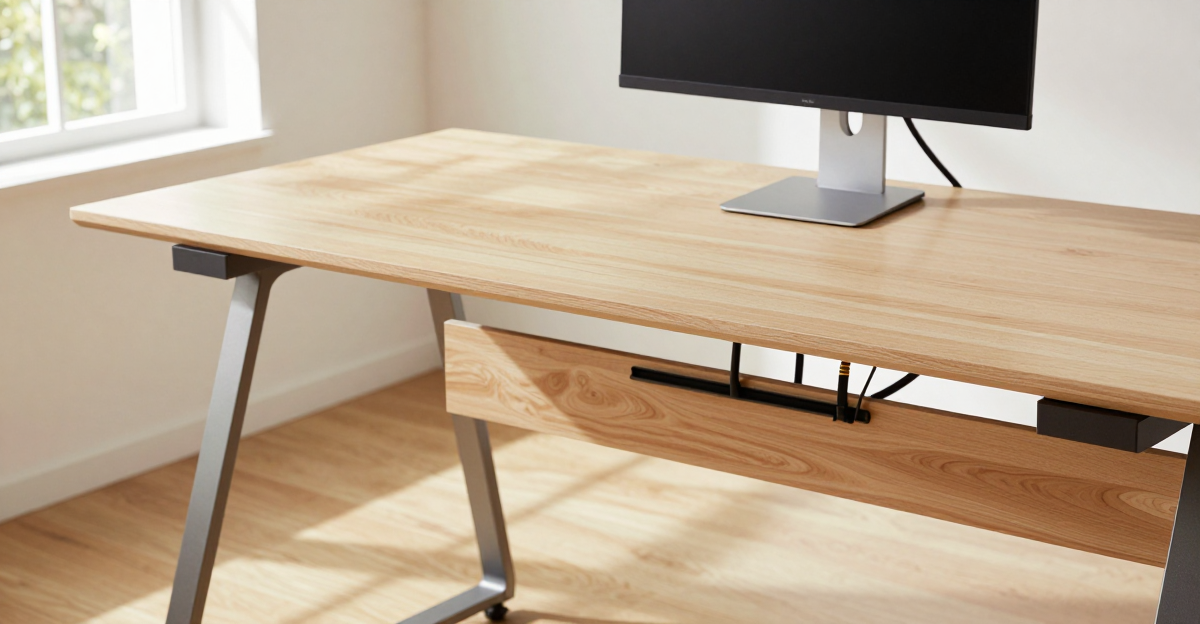
I spent a Saturday afternoon staring at the spaghetti under my desk. Two monitors, a docking station, a laptop charger, a phone charger, a desk lamp, external speakers — twelve cables, one power strip on the floor, and a dust bunny colony that had established self-governance. My desk cable mess was so bad I'd stopped inviting people into my home office. If your desk cable mess is ruining the look of your setup — and let's be honest, quietly stressing you out every time you glance down — here's what actually works.
In a Hurry? Start Here
- Free fixes first: → Jump to Quick Wins — 5-minute fixes you already have supplies for
- Mount a power strip: → Jump to Fix 1: Power Strip — get everything off the floor
- Cable tray or raceway: → Jump to Fix 4: Route Cables — the products that hide it all
- Standing desk users: → Jump to Fix 3: Standing Desk — specific solutions for sit-stand setups
Disclosure: TechDeskZone is reader-supported. When you buy through links on our site, we may earn an affiliate commission at no additional cost to you. See our affiliate disclosure for details.
- Why Your Desk Cable Mess Happens
- Quick Wins — 5 Minutes, Zero Cost
- Fix 1: Get the Power Strip Off the Floor
- Fix 2: Bundle Every Cable That Travels Together
- Fix 3: Standing Desk Cable Strain — The One Fix That Works
- Fix 4: Route Cables Along Desk Edges (Not Across Open Air)
- Fix 5: What to Buy When Free Fixes Aren’t Enough
- What to Buy for a Completely Clean Desk
- The Verdict: The 30-Minute Cable Fix That Actually Lasts
I tried everything: zip ties (too permanent), adhesive clips (fell off after two weeks), a £12 / ~$15 cable box that was too small to close. Then I found the right order of operations. Route first, buy only what you still need. Here’s the system that turned my desk cable mess into something I’m actually proud of.
Why Your Desk Cable Mess Happens (It’s Not Your Fault)
Most people attack cable management backwards. They buy a tray, a box, and a sleeve, then try to force everything into those products. That’s why a desk cable mess comes back after two weeks — you’re hiding the problem instead of routing it.
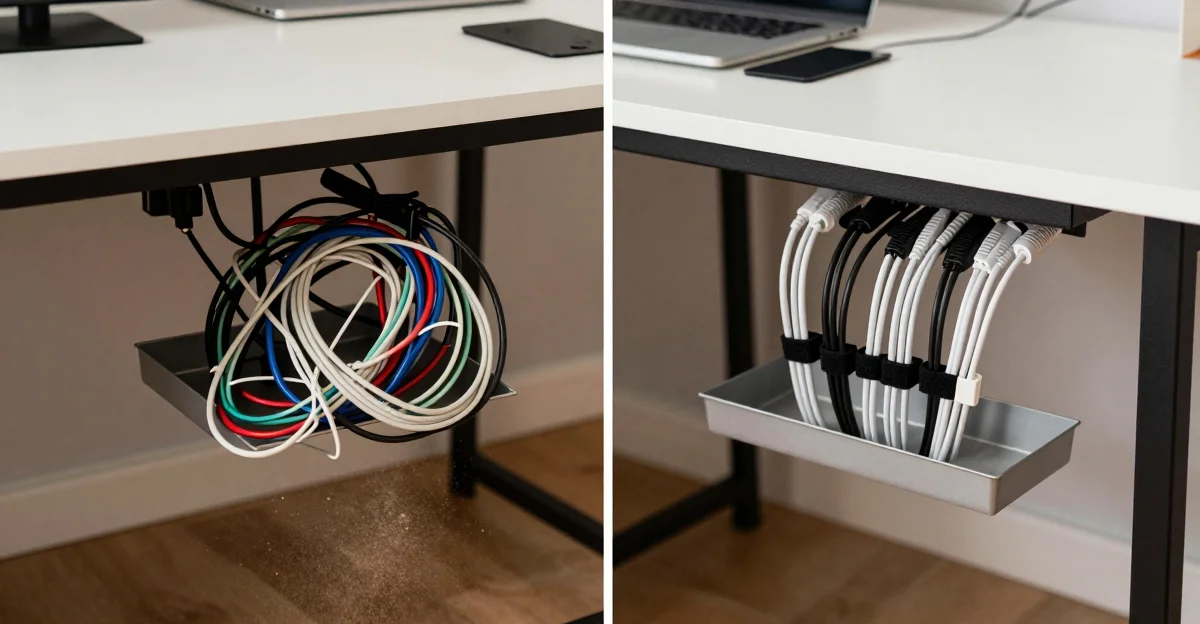
The floor is the enemy. Every cable that touches the floor collects dust, gets kicked, and creates visual chaos. The single biggest fix in cable management is getting everything off the ground.
Standing desks multiply the problem. When your desk moves up and down, every cable needs slack. Too much slack and it pools on the floor. Too little and you unplug something when the desk rises. A fixed-desk routing plan fails completely on a standing desk.
Products solve specific problems — they don’t solve “mess.” A cable tray holds things. Velcro ties bundle things. A sleeve hides things. None of them work unless you’ve already decided where every cable should go. That decision is the free part, and it’s where most people skip straight to buying.
Quick Wins — 5 Minutes, Zero Cost
Do these before buying anything. I’ve seen these three moves alone transform desks from chaos to passable.
- Unplug everything you don’t use daily. That old external hard drive cable, the printer USB you haven’t touched since 2024, the spare phone charger that charges nothing. Yank them. Every unused cable you remove is one less cable to manage.
- Shorten what stays. If your monitor cable is 2 metres and your monitor is 50cm from your laptop, coil the excess behind the monitor, not on the floor. Use the cable’s own loop — most power bricks have built-in cable wrap tabs you never noticed.
- One power strip, one location. If you have cables plugged into three different wall outlets, you have three messes. Consolidate to one power strip under the desk. The fewer anchor points, the fewer routes to manage.
Fix 1: Get the Power Strip Off the Floor
The power strip on the floor is the root of almost every desk cable mess. Cables radiate outward from it like a nervous system, collecting dust and tangling around chair legs. The fix is simple and costs nothing if you already have double-sided tape.
Mount the power strip under your desk. Most power strips have keyhole slots on the back for wall mounting — those same slots work for under-desk mounting. Two small screws into the underside of your desk (or heavy-duty double-sided tape if you’re renting) and your power strip lives upside-down, out of sight. If your desk cable mess starts with a floor-dwelling power strip, this one move changes everything.
Face the outlets toward you. Mount the strip so the outlets point toward where you sit, not toward the wall. This makes plugging and unplugging easy without crawling under the desk.
No screws? Use 3M VHB tape. A 10cm strip of VHB double-sided tape holds a fully loaded power strip indefinitely. Clean both surfaces with rubbing alcohol first. Let it cure for an hour before loading. Cost: about £3 / ~$4 for a roll that’ll do ten power strips.
Fix 2: Bundle Every Cable That Travels Together
Look under your desk. You’ll see cables heading in the same direction — monitor power + HDMI, laptop charger + USB dock cable, speaker power + aux. These pairs or trios should be one bundle, not three separate snakes. A desk cable mess isn’t about how many cables you have — it’s about how many separate paths they take.
Use velcro ties, not zip ties. Zip ties are permanent and you will regret them the first time you need to swap a cable. Velcro ONE-WRAP ties are reusable, adjustable, and cost about £5 / ~$6 for a pack of 50 — enough for three desk setups. Bundle cables every 20-30cm. Not too tight — you should be able to slide a cable out without cutting the tie.
Label both ends of each bundle. A piece of masking tape and a Sharpie. Three months from now, when you need to find the monitor power cable, you’ll thank yourself. This sounds obsessive but takes 30 seconds and saves 10 minutes of cable-tracing later.
Bundling also reduces visible clutter above the desk. Monitor cables, keyboard cables, and desk lamp cables all converge behind your monitor. Bundle them into one clean trunk. Suddenly three messy cables become one neat line. If your desk cable mess is most visible above the desk, bundling is the highest-impact free fix.
Fix 3: Standing Desk Cable Strain — The One Fix That Works
If you have a standing desk, you have a problem fixed desks don’t: every cable needs enough slack to reach when the desk is at full height, but not so much that it puddles on the floor when the desk is low. A desk cable mess on a standing desk is fundamentally different from a fixed desk — the movement creates strain points where cables fail over time.
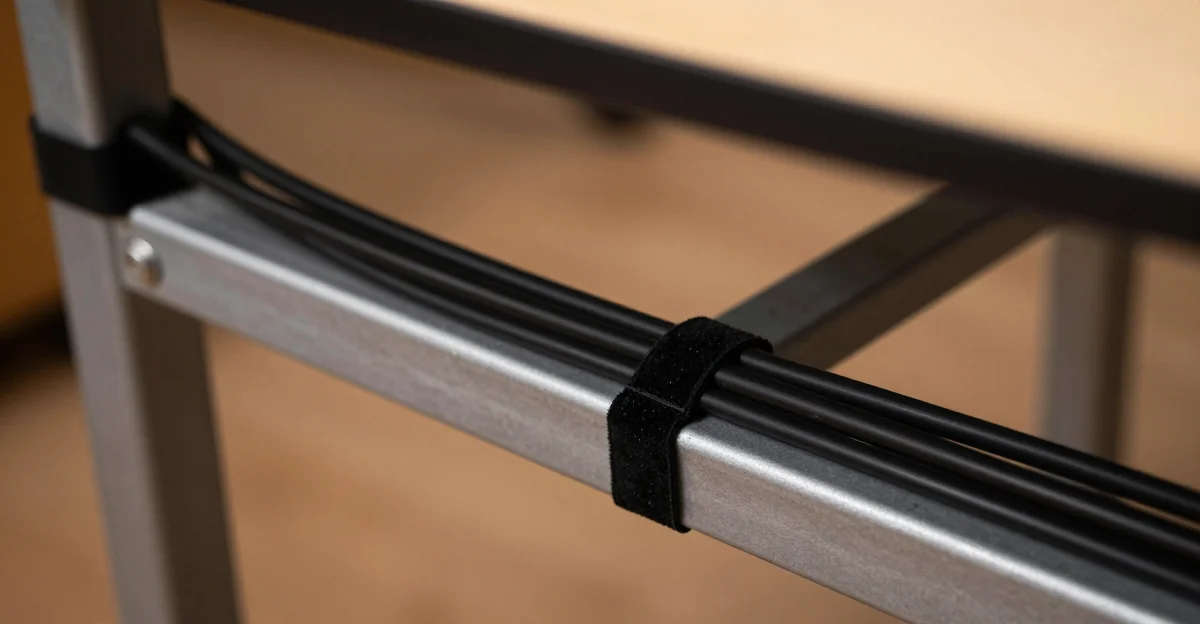
The solution: a single anchor point on the desk frame. Route all cables to one spot on the underside of the desk frame — ideally the rear crossbar. Bundle them there with a velcro strap. From that anchor point, run one clean bundle down to the wall outlet. When the desk rises, the bundle lifts with the frame. When it lowers, the slack stays behind the desk, not on the floor. This technique works for any standing desk — the frame crossbar is the built-in cable highway most people ignore.
Use a spiral wrap for the wall-bound stretch. The section of cables running from the desk frame to the wall outlet takes the most abuse — it flexes every time you adjust height. A spiral cable wrap (£6 / ~$8 for 3 metres) protects the cables and keeps them as one unit. It also looks cleaner than loose velcro ties dangling in mid-air.
Measure at standing height first. Set your desk to its maximum height, then route cables with enough slack to reach the outlet comfortably. When the desk comes back down, manage the excess behind the desk frame, not on the floor.
Fix 4: Route Cables Along Desk Edges (Not Across Open Air)
Cables that cross open space — from the back of your monitor to the side of your desk, or dangling from desk height to floor — are what make a setup look messy even when everything technically works.
Follow the desk frame. Standing desk frames have horizontal crossbars and vertical legs. These are built-in cable highways. Run bundles along the top of the rear crossbar, then down a leg to the floor. Use adhesive cable clips every 30cm to hold bundles in place. Cost: about £4 / ~$5 for a pack of 50 clips.
Monitor arms are cable channels. If you use a monitor arm, it almost certainly has built-in cable routing channels. Pop the plastic covers off, lay your monitor power and video cables inside, snap the covers back on. Zero visible cables from desk to monitor. If your desk cable mess includes monitor cables snaking across your desktop, this is the fix. A good monitor arm does double duty — ergonomics and cable management in one purchase.
Behind the monitor is free real estate. The back of your monitor is invisible to you and everyone on video calls. Coil excess cable length there, secured with a single velcro tie. It’s hidden, accessible, and free.
Fix 5: What to Buy When Your Desk Cable Mess Survives the Free Fixes
After routing, bundling, and anchoring, you’ll still have some visible hardware: the power strip itself, power bricks, that one awkwardly-shaped laptop charger. This is where products earn their place. A desk cable mess that survives the free fixes needs specific tools — here are the five I tested that actually solve specific problems.
Velcro ONE-WRAP Cable Ties — Best First Buy (£5 / ~$6 for 50-pack)
Specs: 8 × 1/2 inch, pre-cut, reusable, multiple colours available, 50-pack
If you buy exactly one cable management product, make it these. I’ve used the same 10 ties across three desk reorganisations and they still grip like new. The pre-cut length (20cm / 8 inches) is perfect for bundling 2-4 cables. They’re thin enough to hide behind a monitor arm, strong enough to hold a bundle of six cables, and peel open instantly when you need to add or remove a cable. If your desk cable mess involves more than three cables heading in the same direction, velcro ties are the answer.
Pros: Reusable indefinitely, pre-cut (no scissors needed), thin profile, multiple colours to match your setup
Cons: Not strong enough for very heavy bundles (power bricks + 6 cables), the adhesive-backed version is weaker than the wrap-only version
Best for: Every single desk. Start here.
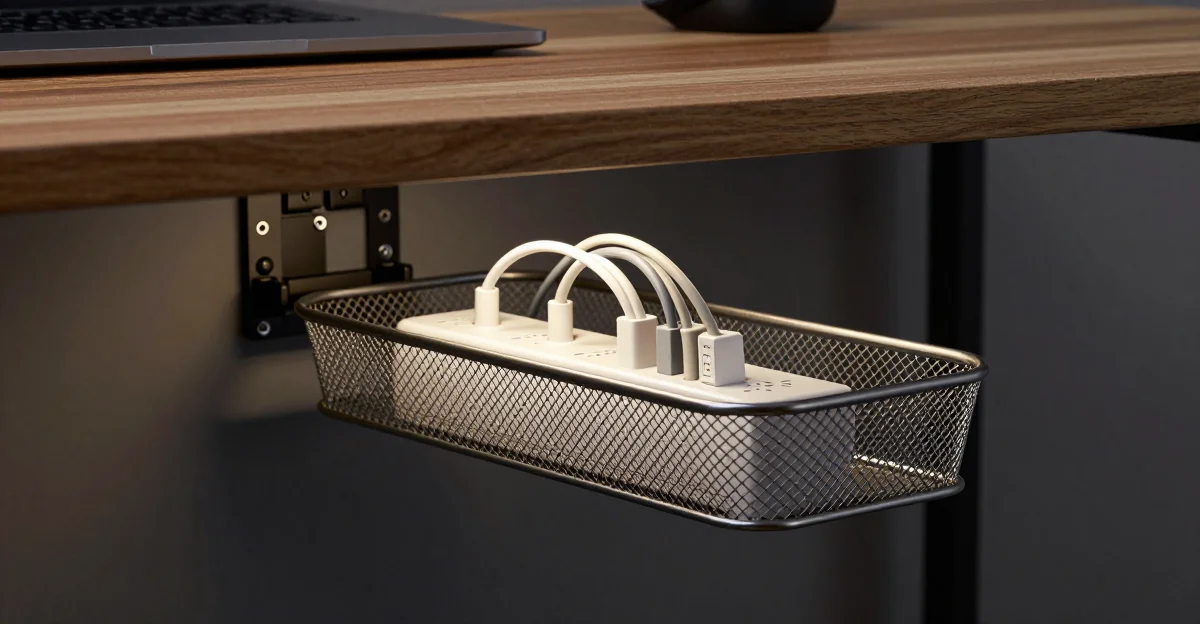
Mokani No-Drill Under-Desk Cable Tray — Best Tray (£18 / ~$22)
Specs: Clamp mount (no drilling), metal mesh, fits desks 0.4-2.2 inches thick, 32 × 12 × 12.5cm, black
This is the tray I recommend to anyone who’s never mounted anything under a desk. The clamp mechanism tightens by hand — no tools, no drilling, no adhesive that fails after six months. It grips desks from thin IKEA tabletops to thick butcher block. The metal mesh means you can see what’s inside without opening anything, and cable ties thread through the holes for internal organisation.
I’ve had one mounted for four months. It holds a 6-outlet power strip, two power bricks, and about 3 metres of bundled excess cable. Nothing has shifted. The clamp hasn’t loosened. For £18 / ~$22 as of June 2026, it’s the best value under-desk tray I’ve tested.
Pros: Genuinely tool-free install, strong clamp grip, metal mesh (not saggy fabric), large capacity
Cons: Clamp knobs are visible from the side of the desk, only fits desks up to 2.2 inches thick, sharp-ish edges (file them down or wrap with electrical tape)
Best for: Most desks. Renters, standing desk owners, anyone who doesn’t want to drill
Avoid if: Your desk is thicker than 2.2 inches or you want a completely invisible mounting solution
Cable Management Box — Best for Floor-Routed Setups (£15 / ~$18)
Specs: Large capacity (fits 6-outlet strip + adapters), ventilated, lid, cable pass-through on both ends, black or white
If your setup requires a power strip on or near the floor — perhaps your desk has no underside access, or you’re using a fixed-desk with a wall outlet too far to route cleanly — a cable management box is the next best thing to under-desk mounting. It’s a plastic box with ventilation slots and cable entry/exit holes at both ends. The power strip lives inside. Cables enter and exit through the slots. The lid closes. From the outside, it’s a neat black box instead of a tangle of plugs.
The key spec to check: internal dimensions. Measure your power strip including any bulky plugs or adapters that stick out sideways. The box needs to be at least 2cm longer and wider than the strip with everything plugged in. Most “large” boxes fit a standard 6-outlet strip with space for two power bricks. Anything bigger needs a tray instead.
Pros: Clean floor-level solution, no mounting required, ventilated (power bricks don’t overheat), cheap
Cons: Still sits on/near the floor (not as clean as under-desk), lid can be fiddly with thick cables exiting, looks like a plastic box (it is one)
Best for: Renters, fixed desks, setups where under-desk mounting isn’t possible
Avoid if: You can mount under the desk — a tray is always cleaner
Spiral Cable Wrap — Best for Standing Desk Flex Sections (£6 / ~$8 for 3m)
Specs: 3 metre length, 10mm diameter (expandable), PE plastic, cut-to-length, black
Spiral wrap is the unsung hero of standing desk cable management. It’s a flexible plastic coil that you wind around cable bundles. Unlike a sleeve (which you have to thread cables through), spiral wrap can be added or removed at any point along a cable run without unplugging anything. This makes it perfect for the section of cable that flexes when your desk changes height — you can wrap it after everything is plugged in.
One 3-metre roll does a complete standing desk setup: from under-desk tray down the leg, across to the wall outlet, with enough left over for a second bundle. Cut it with scissors. Wrap it tight but not stretched — the coil should sit comfortably around the bundle with a 2-3mm gap between spirals.
Pros: Can be added after cables are routed, cut to exact length, protects cables from desk-frame abrasion, cheap
Cons: Doesn’t look as clean as a fabric sleeve, collects dust over time (wipe with damp cloth), visible spiral pattern (some people hate the look)
Best for: Standing desk owners, anyone with exposed cable runs along desk legs or frames
Avoid if: You want an invisible cable run — a fabric sleeve looks cleaner but is harder to install
Adhesive Cable Clips — Best for Desk-Frame Routing (£4 / ~$5 for 50-pack)
Specs: 50 self-adhesive clips, 8mm cable capacity each, clear or black, 3M adhesive backing
These are tiny clear plastic clips with 3M adhesive backing. You stick them along desk legs, frame crossbars, or the back edge of your desk, and press cables into the clip. Each clip holds 1-2 thin cables or one thick power cable. At £4 / ~$5 for 50, you can afford to be generous — place them every 20-30cm along any cable route for a clean, controlled path.
The adhesive is the make-or-break spec. Cheap clips use generic adhesive that fails within weeks — especially on metal desk frames that flex with temperature changes. Look for clips that explicitly list 3M adhesive. Clean the mounting surface with rubbing alcohol before sticking. Press and hold each clip for 30 seconds. Let them cure for an hour before loading cables.
Pros: Ridiculously cheap, near-invisible once installed, work on any surface (metal, wood, plastic), no tools
Cons: Only hold 1-2 cables each, adhesive fails if surface isn’t clean, not reusable (adhesive is one-time)
Best for: Routing cables along desk frames, legs, and back edges
Avoid if: You need to hold 3+ thick cables in one spot — use a velcro strap around the whole frame instead
What to Buy for a Completely Clean Desk
| Product | Type | Price | Key Feature | Best For |
|---|---|---|---|---|
| Velcro ONE-WRAP (50pk) | Ties | £5 / ~$6 | Reusable, pre-cut, thin profile | Start here — every desk needs these |
| Mokani No-Drill Tray | Tray | £18 / ~$22 | Clamp mount, no tools, metal mesh | Hiding power strip + bricks under desk |
| Cable Management Box | Box | £15 / ~$18 | Ventilated, fits 6-outlet strip | Floor setups where mounting isn’t possible |
| Spiral Cable Wrap (3m) | Wrap | £6 / ~$8 | Add after routing, protects flex points | Standing desk cable runs to wall |
| Adhesive Cable Clips (50pk) | Clips | £4 / ~$5 | 3M adhesive, near-invisible | Routing along desk frame and legs |
The Verdict: The 30-Minute Cable Fix That Actually Lasts
Do the free stuff first. Always. Unplug unused cables. Mount your power strip under the desk. Bundle everything that travels together. These three moves take 30 minutes, cost nothing (or the price of double-sided tape), and solve 80% of desk cable messes.
Buy velcro ties before anything else. A £5 / ~$6 pack of Velcro ONE-WRAP ties is the only product every desk needs. Bundling cables is the highest-impact move in cable management and velcro ties make it trivially easy. Even if your desk cable mess seems overwhelming, start with ties before you spend on anything else.
The tray is worth it — if you mount it. The Mokani no-drill tray at £18 / ~$22 is the best value under-desk solution I’ve used. It hides the power strip, power bricks, and excess cable length in one clean unit. But it only works if you’ve already bundled and routed your cables into a single trunk that feeds into it. Buy the velcro ties first, then the tray.
Standing desk owners: spiral wrap is non-negotiable. The flex section between your desk frame and the wall outlet takes abuse. A £6 / ~$8 spiral wrap protects the cables and makes the whole setup look intentional rather than improvised. Want more product options? Our full cable management roundup compares trays, sleeves, boxes, and raceways across every budget.
Cable management solves the mess under your desk — but if your actual desk surface is the problem too, a good desk mat protects it and hides scratches. And if your whole workspace needs an overhaul, start with the complete home office setup guide.
← Back to Ergonomics Hub