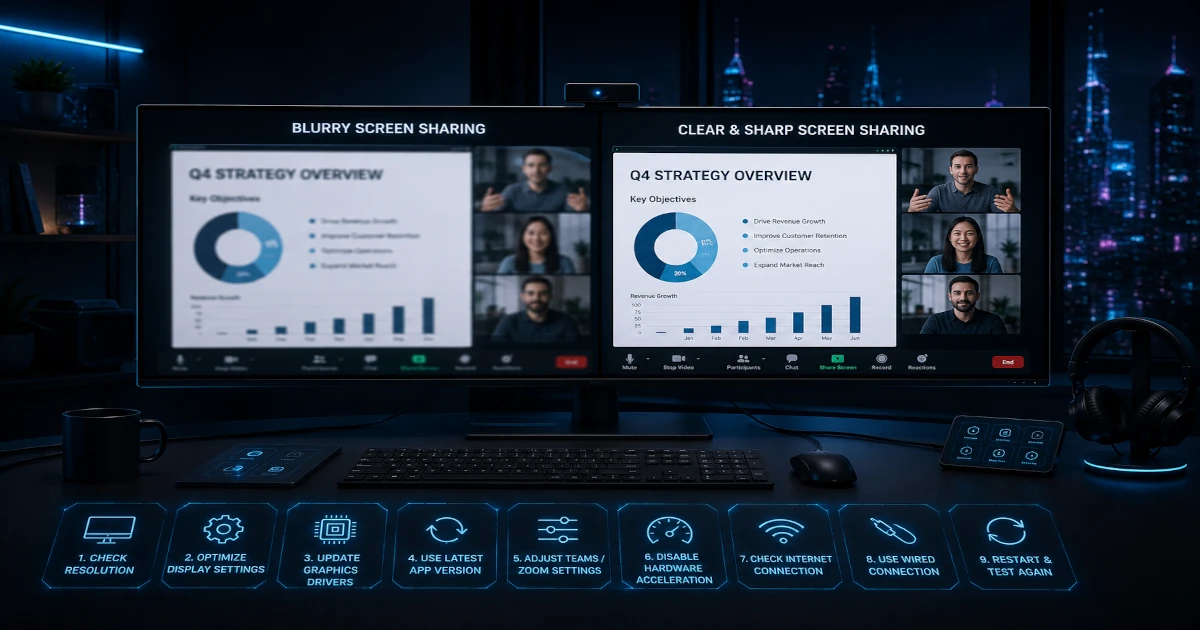
You are presenting quarterly results to your team. You fire up the slide deck, hit share screen on your 34-inch ultrawide, and start talking. Ten seconds in, Slack pings: "I cannot read a single word." You squint at your own screen — everything looks perfect at your end. What you cannot see is what your colleagues see: your 3440×1440 canvas crushed into a 1920×1080 viewport rather than at its intended size. I have been on both sides of this conversation more times than I can count, and after cross-referencing every fix Microsoft, Zoom and Google document against what 3440×1440 owners report in their support forums, here is what actually works.
Disclosure: TechDeskZone is reader-supported. When you buy through links on our site, we may earn an affiliate commission at no additional cost to you. See our affiliate disclosure for details.
Screen Sharing
Troubleshooting Guide
In a Hurry? Start Here
Three quick answers to fix your ultrawide screen sharing right now:
- You just need it working for the next meeting? → Jump to Fix 1: share a window, not your screen
- You present daily and want a one-time setup? → Jump to Fix 4: PowerToys FancyZones or Fix 8: ZoneShare
- You need a bulletproof solution for client demos? → Jump to Fix 9: HDMI capture card
Table of Contents
- Why Ultrawide Screen Sharing Breaks
- Fixes 1-3: App-Level Settings (Free, Instant)
- Fixes 4-5: OS-Level Methods (Free, One-Time Setup)
- Fixes 6-7: Workflow Tricks (Free, No Tools Needed)
- Fix 8: Paid Tools
- Fix 9: Hardware Capture Card
- Quick Reference: All 9 Fixes Compared
- Common Mistakes That Do Not Work
- The Verdict: Which Fix Should You Use?
Why Ultrawide Screen Sharing Breaks
This is not a bug in Teams or Zoom. It is math, and the math is simple enough that understanding it will help you pick the right fix.
The standard meeting participant is looking at a 1920×1080 display, a 16:9 aspect ratio that has been the default for laptops and desktops for well over a decade. If you are weighing panel formats elsewhere, the how to choose a monitor guide covers that separately. Your ultrawide monitor runs at 3440×1440 (21:9) or 5120×1440 (32:9). When you share your entire screen, the meeting app has exactly two choices: downscale your ultrawide to fit 1920 pixels wide, or crop it. Every major platform chooses downscaling.
Here is what that does to your content. A 3440-pixel-wide desktop scaled to 1920 pixels means every element shrinks to roughly 56% of its original size. On a 5120×1440 super-ultrawide, it drops to about 37.5%. Text that was perfectly readable at 14pt on your screen becomes roughly 8pt on your colleague’s 13-inch laptop. The meeting app is not broken. It is faithfully transmitting your screen at the only resolution the recipient’s display can show. The problem is the mismatch between your canvas and their viewport.
Ultrawide monitors give you a huge amount of horizontal space and an ergonomic home office setup — a trade most 21:9 owners accept willingly — but screen sharing is the one scenario where all that extra horizontal space becomes a liability. The nine fixes below solve exactly this mismatch, each in a different way. Some work by sharing a 16:9 subset of your screen instead of the whole thing. Others create a virtual 16:9 display that meeting apps treat as a normal monitor. The right choice depends on how often you present and which platform your team uses.
Fixes 1-3: App-Level Settings (Free, Instant)
Start here. These three fixes require zero additional software, work across all five major platforms, and solve the problem for most occasional presenters. If you only share your screen once or twice a week, one of these methods is probably all you need.
Fix 1: Share a Window, Not Your Screen
This is the single most effective fix that almost nobody tries first. Instead of clicking “Share Screen” and broadcasting your entire 3440-pixel desktop, select “Share Window” and pick only the application you want your audience to see: PowerPoint, your browser, a single Excel sheet, or VS Code.
Here is why it works. When you share a window rather than your screen, the meeting app transmits that window at its actual pixel dimensions. If PowerPoint is running in a 1920×1080 window, your colleagues see exactly 1920×1080 pixels of content. No downscaling. No tiny text. The rest of your ultrawide desktop stays private, which is a bonus for anyone who keeps Slack or email open on the side.
How to do it on each platform:
- Microsoft Teams: Click Share → under “Window,” select the app from the grid of open windows. Teams shows a live thumbnail for each window so you can confirm the right one.
- Zoom: Click Share Screen → the window list appears below the screen thumbnails. Select your app. Bonus: check “Share computer sound” at the bottom if your presentation includes audio.
- Google Meet: Click Present Now → “A window” → choose from the pop-up list. Meet also offers “A Chrome tab” here, which is Fix 3.
- Webex: Click Share → “Application” → select from the list. Webex dims unselected windows so you can see exactly what participants will see.
- Slack: During a huddle or call, click the screen share icon → “Window” → pick your app. Slack’s window picker shows only title bars, not thumbnails, so double-check the window title matches.
Limitations: Power users who constantly switch between multiple apps during a presentation will find window sharing tedious. Every time you need to show a different application, you have to stop sharing, switch windows, and start sharing the new one. For multi-app demos, skip to Fix 4 (FancyZones) or Fix 5 (OBS).
Fix 2: Zoom’s Portion of Screen (Zoom Only)
Zoom has a feature that no other major platform provides, and it is the cleanest free fix available if your team uses Zoom. The “Portion of Screen” option lets you draw a green rectangle over any part of your desktop, and Zoom shares only what is inside that rectangle at 1:1 pixel ratio. Your colleagues see a standard 16:9 window with perfectly readable content, and you keep the rest of your ultrawide for notes, speaker view, or the meeting chat.
How to use it:
- Click Share Screen in Zoom.
- Click the Advanced tab at the top of the sharing window.
- Select Portion of Screen.
- A green border appears. Drag its corners to define a 16:9 rectangle — roughly 1920×1080 pixels. Position it over your slide deck, demo app, or document.
- Click Share. Only the area inside the green rectangle is transmitted.
Pro tip: Before your meeting, open PowerPoint or your demo app and resize it to fill roughly the center third of your ultrawide. Then when you draw the green Zoom rectangle over that window, you get pixel-perfect sharing with zero setup per meeting. Position your slide deck in the center, meeting controls on the left edge, and speaker notes on the right. Colleagues see the slide deck at full resolution. They never know the rest exists.
Limitations: This is a Zoom-exclusive feature. Teams, Meet, Webex, and Slack do not have an equivalent. The green rectangle resets between meetings, so you redraw it each time.
Fix 3: Share a Browser Tab Instead of Your Screen
If the thing you are presenting lives in a browser — Google Slides, Figma, Notion, Jira, a dashboard, or a web app — sharing the browser tab instead of your screen solves the problem instantly. A Chrome or Edge tab renders at its own viewport dimensions, which for most pages is well under 1920 pixels wide. The meeting app transmits that tab at its native width, and your colleagues see everything at full size.
How to do it:
- Google Meet: Click Present Now → “A Chrome tab.” Meet lists all your open tabs with favicons and titles. Pick the right one. Meet’s tab sharing is the best implementation — it even shows a “You are presenting” overlay on the shared tab so you do not accidentally navigate away.
- Microsoft Teams: Share → under “Window,” look for your browser with the tab title appended. Teams treats each browser window as a separate shareable item but does not isolate individual tabs — share the browser window sized to a reasonable width.
- Zoom: Share Screen → select your browser from the window list. For tab-level isolation, use a separate browser window with only the presentation tab open.
- Webex and Slack: Share the browser window from the application list. Same approach as Teams and Zoom.
Limitations: Only works for web-based content. A native PowerPoint file, Excel spreadsheet, or desktop app cannot be shared this way. If you frequently present a mix of web and desktop content, pair this with Fix 1: switch between tab sharing for web content and window sharing for desktop apps during the same meeting.
Fixes 4-5: OS-Level Methods (Free, One-Time Setup)
If you present frequently and want a set-it-and-forget-it solution, these two methods create a permanent 16:9 sharing zone on your ultrawide. Set them up once, and every meeting app treats that zone as a normal display.
Fix 4: PowerToys FancyZones (Windows)
Microsoft PowerToys is a free, open-source utility maintained by Microsoft. Its FancyZones feature lets you define custom window snap zones on your desktop. Create a 1920×1080 zone in the center of your ultrawide, snap your presentation app into it, and share that window. The snapped window is exactly 16:9, and your audience sees it at perfect 1:1 resolution.
Setup (do this once):
- Install PowerToys from the Microsoft PowerToys GitHub or the Microsoft Store (free).
- Open PowerToys Settings → FancyZones.
- Click “Launch layout editor.”
- For your ultrawide, create a custom layout: one 1920×1080 zone centered, with narrow side zones for your notes and meeting controls. Or keep it simple: one large center zone for sharing and let the edges stay unsnapped.
- Save the layout. It is now active on your ultrawide.
Using it in meetings:
- Hold Shift while dragging any window. FancyZones highlights appear.
- Drop the window into your center 16:9 zone. It snaps to exactly 1920×1080 pixels.
- In your meeting app, share that window. Done.
This is the method most presenters settle on. A three-zone layout works well on a 34-inch ultrawide: a wide center zone for whatever you are presenting, a narrow left zone for meeting controls and chat, and a narrow right zone for speaker notes. Your audience has no idea you can see beyond the slide deck they are watching.
Limitations: Windows only. macOS users, skip to Fix 5. Some apps with custom window chrome (Adobe apps, older Java applications) do not snap cleanly into FancyZones — test with your specific apps before relying on this for an important presentation.
Fix 5: OBS Virtual Camera (Windows + macOS)
OBS Studio is a free, open-source tool built for streamers, but it solves the ultrawide sharing problem elegantly. You create a 1920×1080 canvas in OBS, capture a 16:9 portion of your ultrawide display, and output it as a 1920×1080 virtual camera feed. If the far end still judges what it sees, the best webcam guide covers the camera side. In your meeting app, instead of sharing your screen, you select “OBS Virtual Camera” as your camera. Your colleagues see a clean 1080p feed of exactly the content you framed.
Setup (do this once):
- Download and install OBS Studio (free, obsproject.com).
- Open OBS. Go to Settings → Video. Set Base (Canvas) Resolution to 1920×1080 and Output (Scaled) Resolution to 1920×1080.
- In the Sources panel, click + → Display Capture. Name it “Ultrawide Capture” and click OK.
- Right-click the Display Capture source → Transform → Edit Transform. Set Crop: Left and Crop: Right values to trim the ultrawide edges until only a 1920px-wide center strip remains. For a 3440×1440 monitor, crop roughly 760px from each side. For 5120×1440, crop roughly 1600px from each side.
- Position the cropped region over the area where you normally keep your presentation app.
- Click “Start Virtual Camera” (bottom right of the OBS window).
Using it in meetings:
- Open OBS and ensure Virtual Camera is running.
- In your meeting app, instead of sharing your screen, select “OBS Virtual Camera” as your video source.
- Anything visible inside your OBS crop area is what your audience sees.
Limitations: This method shares your content as a video feed, not a screen share. That means your colleagues see your presentation at video quality (typically 1080p at the meeting app’s bitrate), which is fine for slides and documents but softens small text slightly. For pixel-perfect text sharing, prefer Fix 1, 2, or 4. OBS also adds a small CPU overhead, typically 2-5% on a modern laptop, but worth checking if you run on older hardware.
Fixes 6-7: Workflow Tricks (Free, No Tools Needed)
These two methods require no installation and no configuration. They are workflow adjustments you can adopt in under a minute.
Fix 6: Run Apps Windowed at 16:9
Instead of maximizing every application across your full 3440 or 5120 pixel width, run the apps you present from in a 16:9 window. Resize them to roughly 2560×1440 (QHD, which is 16:9) or 1920×1080, position the window in the center of your ultrawide, and share that window.
Most modern apps remember their last window size, so you only need to set this once per application. Keep PowerPoint, your terminal, and your browser each trained to open at roughly 2560×1440 on the days you know you will be presenting. On a 3440×1440 ultrawide, a centered 2560×1440 window leaves about 490 pixels on each side for meeting controls and notes. On a 5120×1440 super-ultrawide, you have even more breathing room.
Why 2560×1440 works: Downscaled to a 1920×1080 recipient viewport, QHD content loses some sharpness but remains perfectly readable because 2560/1920 = 1.33× scale rather than 3440/1920 = 1.79×. Text at 14pt in your 2560px window appears at roughly 10.5pt on the recipient’s screen instead of 7.8pt. That is the difference between slightly soft and completely illegible.
Limitations: You give up the full ultrawide workspace for the apps you present from. For daily presenters who spend hours sharing their screen, this trade-off can feel like working with one hand tied behind your back. Use this as a quick fix while you set up one of the permanent solutions above.
Fix 7: PowerPoint Presenter View + Share Slide Show
If most of your presentations happen in PowerPoint, this is the single cleanest solution. PowerPoint’s Presenter View splits your display into two windows: the slide show that your audience sees, and a private presenter console with your notes, a timer, and a slide thumbnail strip. Share only the slide show window, and your audience gets a perfect 16:9 presentation while you keep full control privately on your ultrawide.
PowerPoint (Desktop):
- Open your presentation. Go to the Slide Show tab.
- Check “Use Presenter View.”
- Start the slide show. Presenter View opens as a separate window.
- In your meeting app, share the slide show window (not Presenter View and not your entire screen).
- You see speaker notes, next slide preview, and a timer. Your audience sees only the current slide.
Google Slides:
- Open your presentation and click the arrow next to “Present” → “Presenter View.”
- A new browser window opens with speaker notes, a timer, and slide thumbnails.
- The slides appear in a separate tab or window.
- In your meeting app, share the tab or window showing the slides, not the presenter console.
This is the only method on this list that actually improves your presentation workflow rather than just fixing the aspect ratio problem. Speaker notes visible only to you, next-slide preview, and a running timer on screen — all while your audience sees a perfect 16:9 slide show with zero extra setup.
Limitations: Only works for PowerPoint and Google Slides. Keynote users on Mac can use the equivalent “Rehearse Slideshow” mode, which shows presenter notes on a separate display. For other content types, pair this with Fix 1 or Fix 4.
Fix 8: Paid Tools
When free methods do not quite fit your workflow, two paid tools close the gap. Both work by creating a virtual 16:9 display that your computer treats as a second monitor, and you share that virtual display in any meeting app.
ZoneShare
ZoneShare is a Windows utility that creates a virtual 1920×1080 display mapped to a region of your ultrawide. You define the region once — say, the center 1920×1080 pixels — and ZoneShare creates a virtual monitor at that position. In any meeting app, you select “Share Screen” and pick the virtual ZoneShare display instead of your primary monitor. The app transmits a native 16:9 feed, and you never think about aspect ratios again.
ZoneShare costs $12 as a one-time purchase, not a subscription. For presenters who share their screen five or more times a day across multiple platforms, it pays for itself in saved frustration within the first week. The setup takes under two minutes, and once configured, it works identically in Teams, Zoom, Meet, Webex, and Slack — any app that can share a second display.
An open-source alternative called RegionToShare offers similar functionality for free on Windows. It is less polished than ZoneShare — the interface is utilitarian and it occasionally conflicts with GPU driver updates — but it costs nothing and the core functionality is identical: define a region, share it as a virtual display.
Limitations: Windows only. Neither ZoneShare nor RegionToShare has a macOS version as of mid-2026. Mac users, OBS Virtual Camera (Fix 5) is your closest equivalent for a permanent setup. Virtual display drivers on Windows can occasionally conflict with GPU driver updates; after a major NVIDIA or AMD driver update, you may need to reconfigure ZoneShare once.
Fix 9: Hardware — HDMI Capture Card
This is the nuclear option. It costs money, involves cables, and requires more setup than every other fix on this list combined. It is also completely bulletproof. If you present to clients, run live training sessions, or stream to an audience where a broken screen share is not an option, the hardware route removes every variable.
How it works: An HDMI capture card takes a video signal from your GPU, converts it to USB, and presents itself to your computer as a standard webcam. If the image still disappoints, the webcam looks bad fix guide covers the camera-side causes. You configure your GPU to output a 1920×1080 signal to the capture card. In any meeting app, you select the capture card as your camera. Your audience sees a clean, uncompressed 1080p feed regardless of your monitor resolution, meeting app, or operating system.
What you need:
- Capture card: Elgato Cam Link 4K (~$100/£85) is the standard. It supports up to 4K30 or 1080p60 input and is recognized by every meeting app without driver installation. Budget alternatives like a generic HDMI-to-USB capture dongle (~$25/£20) work for 1080p at 30fps, which is sufficient for slide decks and static content.
- HDMI cable: Any HDMI 2.0 cable works. HDMI 2.0 handles 1080p60 and 4K30 without issue. The cable bundled with most monitors is HDMI 1.4, which also works for 1080p60.
- GPU output: Your GPU needs a free HDMI port. Most desktop GPUs have one HDMI and multiple DisplayPort outputs. If your only HDMI port is connected to your monitor, use a DisplayPort-to-HDMI adapter (~$10/£8) to convert the signal to HDMI, or use a capture card that accepts DisplayPort input directly, such as the Elgato 4K60 Pro (PCIe, ~$250/£210).
Setup:
- Connect the capture card to a free HDMI port on your GPU and a USB port on your computer.
- In Windows Display Settings or macOS System Settings → Displays, configure the capture card as a mirrored or extended display at 1920×1080.
- In your meeting app, select the capture card (it appears as “Cam Link 4K” or “USB Video”) as your camera.
- Anything you drag onto the 1920×1080 virtual display is what your audience sees.
This is the setup I recommend for trainers, product demo specialists, and anyone whose income depends on flawless presentations. It is the only solution on this list that works identically across every platform, every operating system, and every meeting app — because the capture card presents itself as a dumb camera, and every app since 2010 knows how to show a camera feed.
Limitations: Cost ($25-$100), physical cables, and one more HDMI port occupied. The content appears as a video feed, which means meeting apps may apply video compression — text sharpness is slightly below a native screen share, though perfectly readable at 1080p. Not portable: this setup lives on your desk and does not travel well.
Quick Reference: All 9 Fixes Compared
| # | Fix | Teams | Zoom | Meet | Webex | Slack | Difficulty | Cost |
|---|---|---|---|---|---|---|---|---|
| 1 | Share a Window | Yes | Yes | Yes | Yes | Yes | Easy | Free |
| 2 | Zoom Portion of Screen | — | Yes | — | — | — | Easy | Free |
| 3 | Share a Browser Tab | Yes | Yes | Yes | Yes | Yes | Easy | Free |
| 4 | PowerToys FancyZones | Yes | Yes | Yes | Yes | Yes | Medium | Free |
| 5 | OBS Virtual Camera | Yes | Yes | Yes | Yes | Yes | Advanced | Free |
| 6 | Windowed 16:9 Mode | Yes | Yes | Yes | Yes | Yes | Easy | Free |
| 7 | PowerPoint Presenter View | Yes | Yes | — | Yes | — | Easy | Free |
| 8 | ZoneShare | Yes | Yes | Yes | Yes | Yes | Medium | $12 |
| 9 | HDMI Capture Card | Yes | Yes | Yes | Yes | Yes | Advanced | $25-100 |
Common Mistakes That Do Not Work
Before you spend an afternoon tweaking settings, here are three things well-meaning colleagues and forum posts will suggest that do not solve the problem. None of the three holds up on a 3440×1440 display.
Changing your monitor resolution to 2560×1080. This sounds plausible: drop the resolution, get closer to 16:9. The problem is that 2560×1080 is 21:9 — the exact same ultrawide aspect ratio, just at a lower pixel count. Your 3440×1440 native panel is physically 21:9 shaped. Running it at 2560×1080 stretches every pixel horizontally to fill the same physical width, making text softer without solving the aspect ratio mismatch. Your colleagues still see a downscaled ultrawide feed with tiny text, except now it looks bad on your end too.
Zoom’s “Optimize for video clip” checkbox. This setting is designed to smooth out motion when sharing full-screen video or animation. It caps the shared feed at 30fps with a higher bitrate allocation but does absolutely nothing to the aspect ratio. Optimize for video clip makes moving content look better at the cost of text sharpness. For slide decks and documents, it actually makes the problem worse.
Sharing via the mobile or web version of Teams, Slack, or Zoom. Browser-based and mobile versions of meeting apps have a reduced feature set. The web version of Teams does not support window-level sharing — you get “Entire Screen” or nothing. Slack’s mobile app does not support screen sharing at all during huddles. Desktop apps have the full feature set. If you are troubleshooting why your share options look different from the screenshots in this guide, you are probably on the web version.
The Verdict: Which Fix Should You Use?
The Verdict
After weighing all nine methods against how they behave on a 34-inch 3440×1440 ultrawide under both Windows 11 and macOS, the right fix depends entirely on how often you present and what platform your team uses.
For 90% of people: Fix 1 (share a window) solves the problem immediately with zero setup. It works on every platform and takes three seconds per meeting. If you only present occasionally, stop here.
If your team uses Zoom: Fix 2 (Portion of Screen) is the best free tool any platform offers. Three clicks, pixel-perfect 16:9 output, and the rest of your ultrawide stays private.
If you present daily: Fix 4 (PowerToys FancyZones, Windows) or Fix 5 (OBS Virtual Camera, cross-platform). Set up once, works forever. Add Fix 7 (Presenter View) if most of your content lives in PowerPoint.
If your income depends on flawless presentations: Fix 9 (HDMI capture card). It is $25-100 for a setup that works identically on every platform, every operating system, and every meeting app — no software updates, no permission prompts, no surprises.
Whichever fix you choose, the underlying principle is the same: stop sharing your entire ultrawide, and start sharing a 16:9 subset. Once you make that shift, you will never again see “I cannot read anything” pop up in the meeting chat.
Once your ultrawide screen sharing is sorted, the rest of your workspace matters just as much — see our complete best home office setup guide for monitor placement, desk ergonomics and cable routing.
← Back to Monitors Hub | Second Monitor Not Detected? 7 Fixes
← Back to Guides Hub